Progressus DevOps/Jira Integration
Solution Overview
This is an Integration solution to allow data entered in DevOps\Jira to flow to Progressus in order to minimize the number of places that users need to enter their time. These enhancements will connect DevOps\Jira objects such as Projects, Features, and Tasks with their related Progressus Objects. This Power Platform automated solution consists of the following key features:
Manual option in Power Automate Flow to do initial integration of existing Projects and Features in DevOps\Jira to Progressus.
Provides a scheduled integration that captures changes in DevOps\Jira Work Items and sends it to the matching objects in Progressus.
Logging of Integration activity in Progressus. If Advanced Logging is turned on, all integration actions will be logged. When off, only errors will be logged.
Custom Connector for Progressus. This is used to do more advanced Http Get operations that are not available in the standard Business Central connector. This Custom connector allows for retrieving multiple records using a filter rather than getting only one specific record by ID.
Note
Throughout this document, DevOps\Jira may be referred to as the ‘source’ system since this solution is meant to be adaptable to different source systems.
Overview of Steps to Integrate Jira/DevOps with Progressus/Business Central
- Download the Integration files: Download Integration Files
- Import Power Automate Objects: Import Solution
- Configure Power Automate: Power Automate Setup
- Configure Business Central Integration: Business Central Integration Setup
- Turn on Integration Flow: Interval Frequency on Scheduled Work Flow
Power Automate Integration Overview
The integration runs on a schedule. By default, it will run every 10 minutes, but this schedule can be adjusted as needed. Assuming that the schedule is set to 10 minutes, the flows will check for any changes to work items from the source within the last 10 minutes. Below are the main actions taking place for each of the recently changed work items.
Feature to Task Process
Gets recently changed Features from DevOps
Gets the parent Projects of the Features
Updates Project Integration table with any Project name changes
Updates Task Integration table and Creates\Updates Progressus tasks
Time to Timecard Process
Gets recently changed Tasks from DevOps
Gets the parent Feature of the Tasks in DevOps
Calculates hours that were entered on the Task today based on its revision history
Checks for a matching Resource in Progressus based on the DevOps Task’s assigned user
Finds the matching task in Progressus based on the Parent Feature
Finds matching Progressus Time Period based on the assigned resource and today’s date
Creates\Updates Timecard in Progressus based on the above matches
Data Architecture
Data Security
Security Roles
| Display Name | Password Type |
|---|---|
| DevOps Service User | Personal Access Token |
| Jira Service User | Personal Access Token |
| Progressus Service User | Web Service Access Key |
| Office 365 Service User | O365 Username/Password |
Table Mapping
By default, objects in the systems will be matched up like below. This can be customized to match customer needs.
| Progressus Table | DevOps Object | Jira Object |
|---|---|---|
| Projects | Projects | Projects |
| Tasks | Features | Epics |
| Timecards | Tasks | Subtasks |
Power Automate Setup
Download Integration Files
Click this link to access the Request Form.
Complete the form to request the DevOpsProgressusIntegration_1_0_0_16.zip, and click Submit.
An email will be sent to the email address you specified, with a link to download the DevOpsProgressusIntegration_1_0_0_16.zip file.
Tip
Access to download the file via the emailed link is limited to 7 days from the date requested.
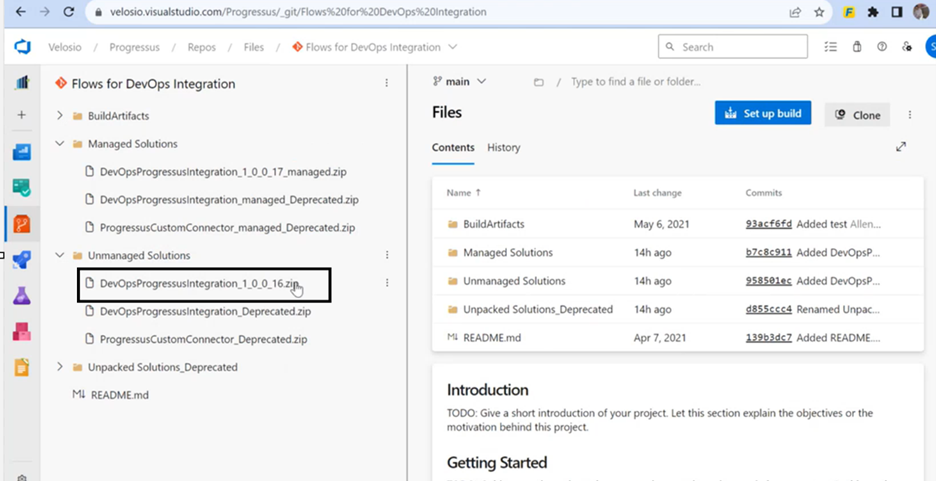
Import Solution
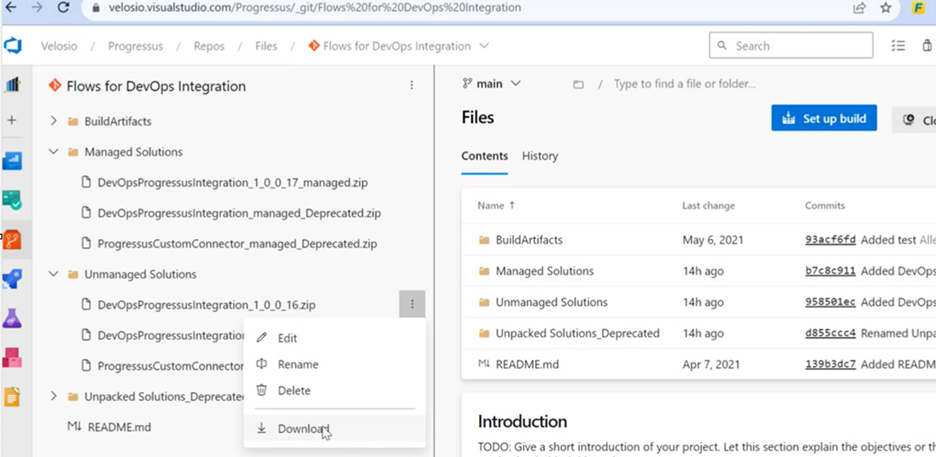
To integrate DevOps with Business Central for Timesheet Operations, locate DevOpsProgressusIntegration_1_0_0_16.zip. Right-click on the file and select Download to download the solution from Files (Flows for DevOps Integration) and install it on Power Automate.
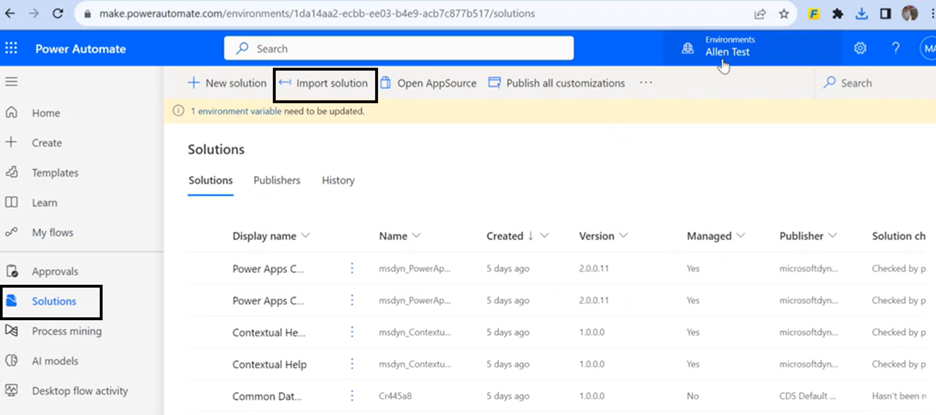
To install the downloaded file, open Power Automate, open the ‘Solution’ section from the left-hand sidebar. Select Import solution from the top ribbon.
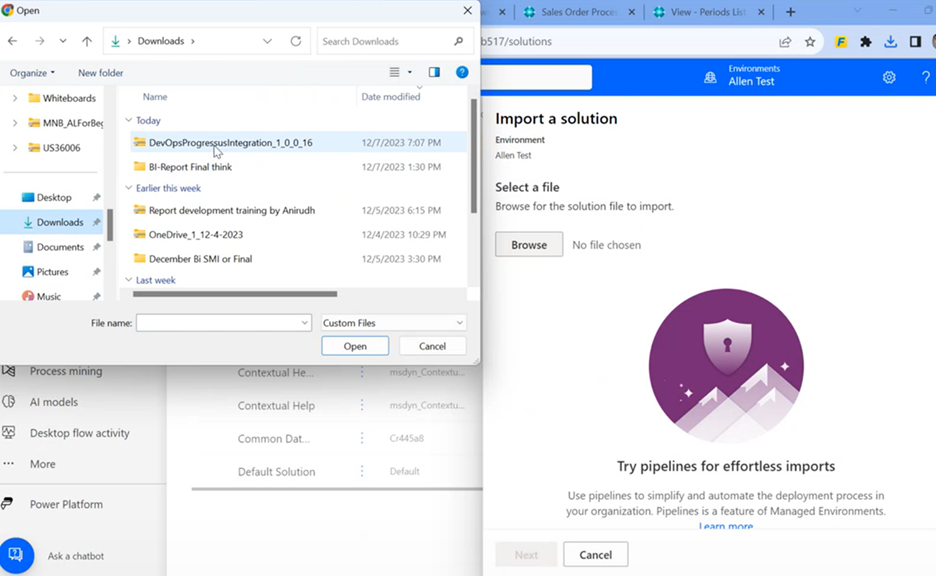
Select the file, click Open.
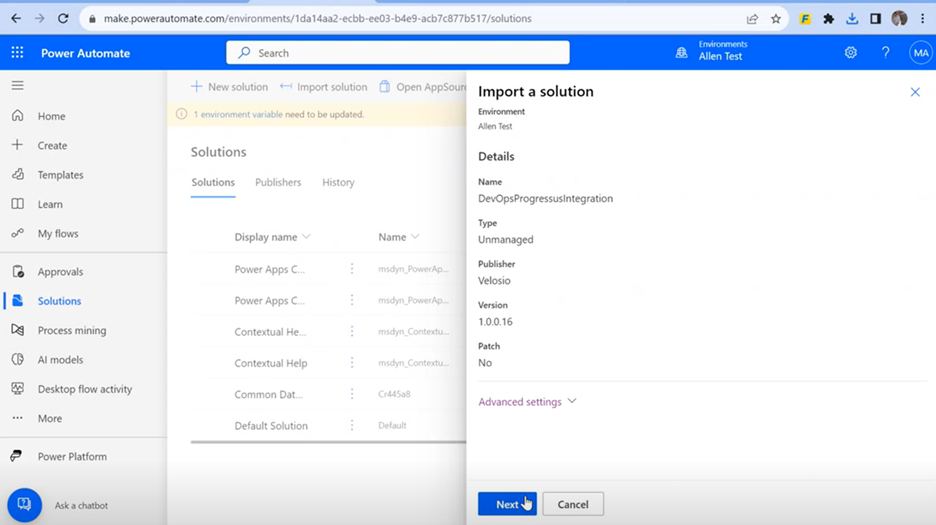
Click Next. The Solution Details display in the right pane. and click Next again.
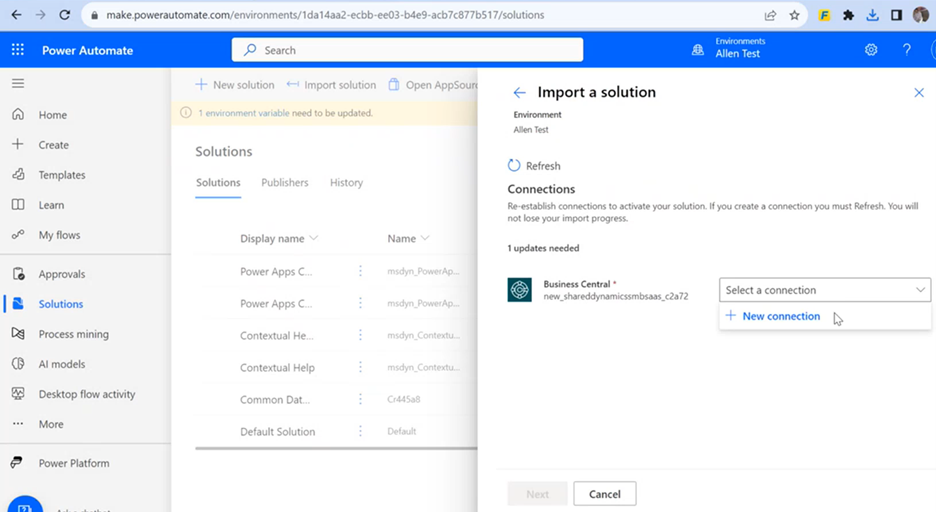
On the next page under Connections, establish connection with Business Central as shown below.
Click on the drop-down and select New Connection.
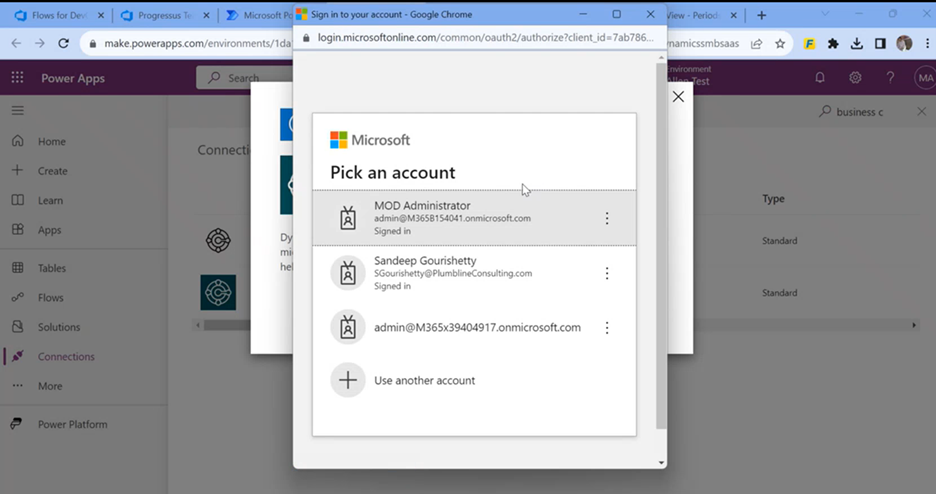
The Available Connection List page. Here, search for Dynamics 365 Business Central and Create to create a new connection.

Note
Use Business Central credentials to create the connection between Business Central and Power Automate.
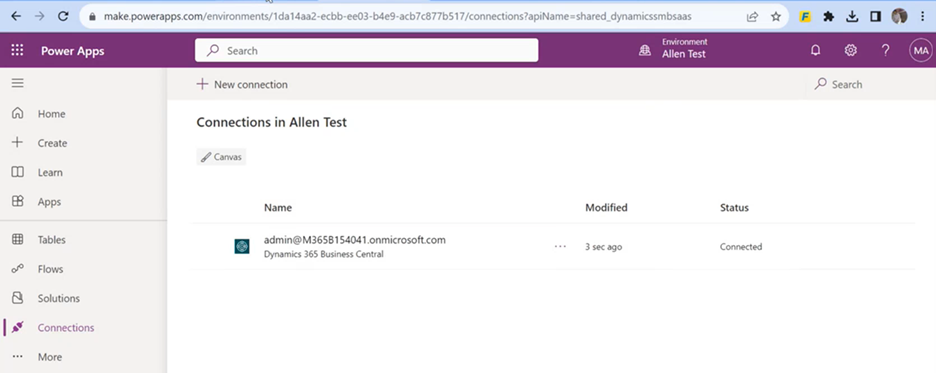
Click the back arrow to return to the Import Solution page and refresh. The connection should display as shown below.
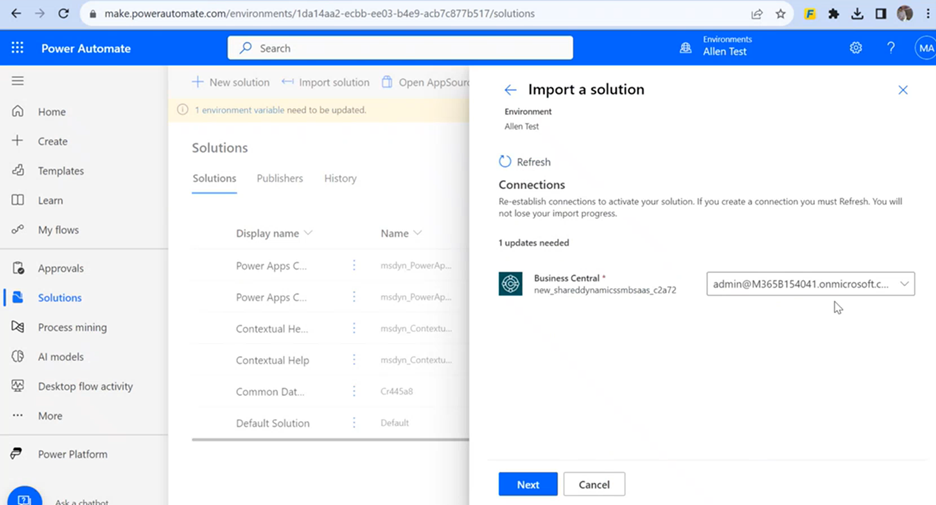
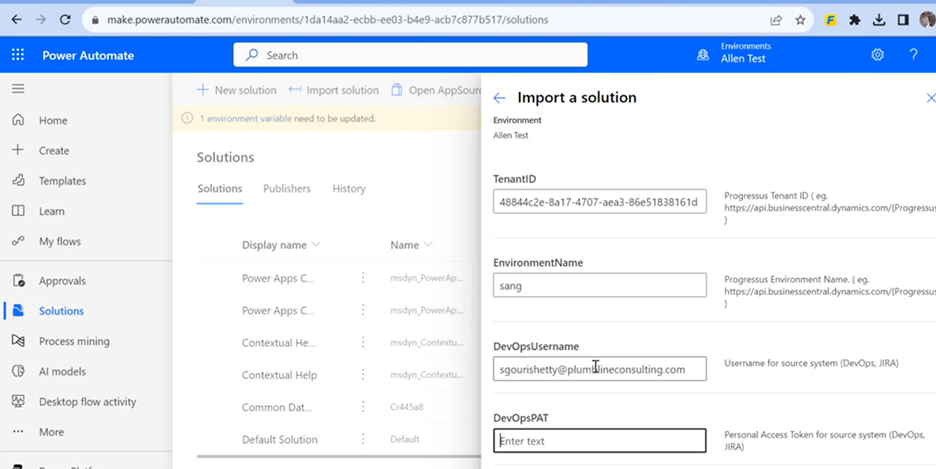
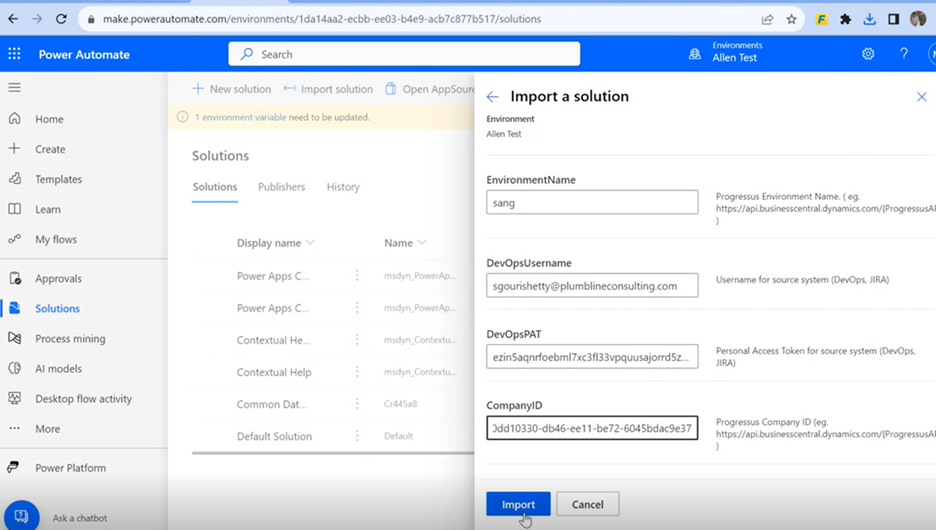
Click Next, then provide tenant details for the connection, such as Tenant ID (Progressus Sandbox Environment ID), Environment Name (Sandbox Name), DevOps User Name, Personal Access Token (PAT) and Company ID (GUID from Companies list).
To create a Personal Access Token, open DevOps, navigate to Settings and click on the Personal Access Token link. Under Scopes, select Full access and enter Name. Click Create button.
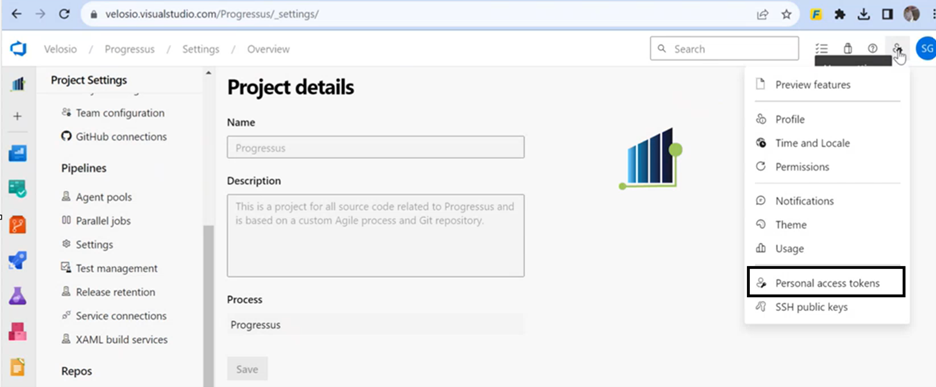
Click on new token and Create a new personal access token.
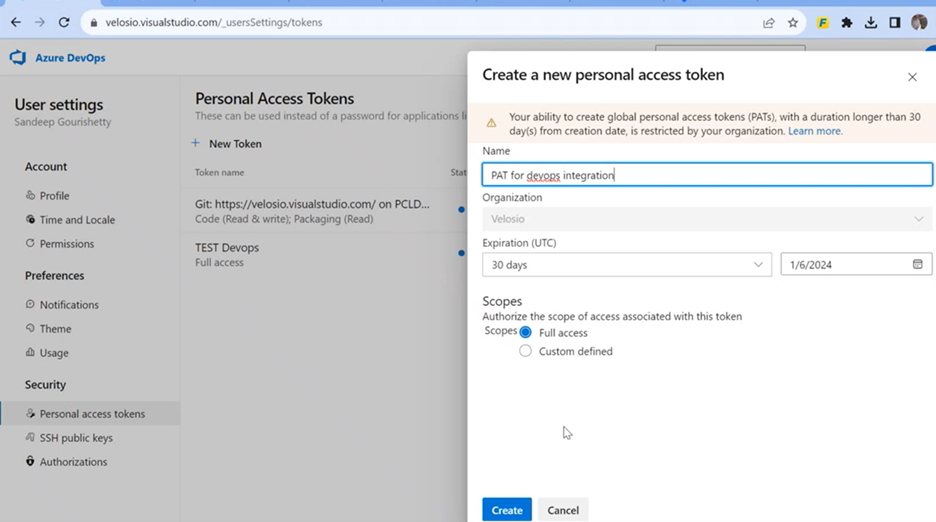
Copy the Personal Access Token for DevOps integration and use it for importing the solution.

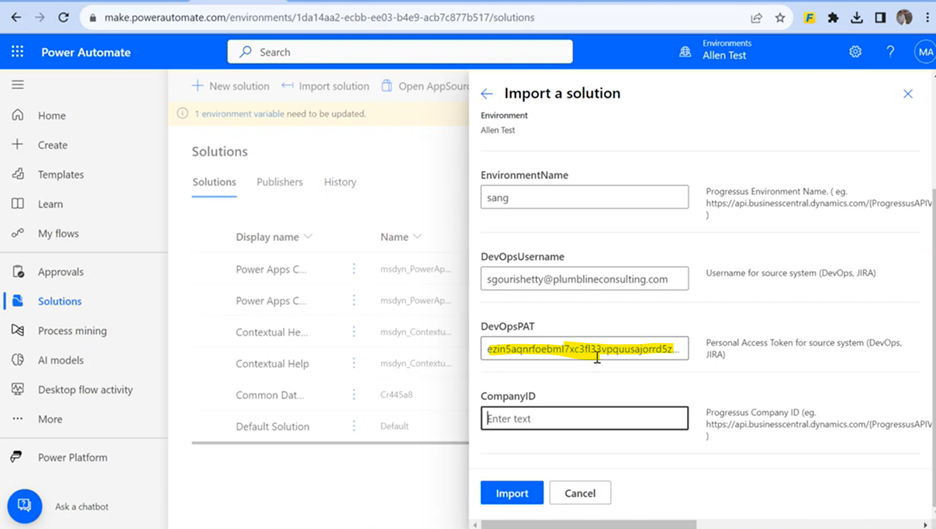
For the Company ID open the Progressus Companies list on Business Central environment and copy the GUID of the company to integrate.


Click Import. This initiates importing the solution into the environment.
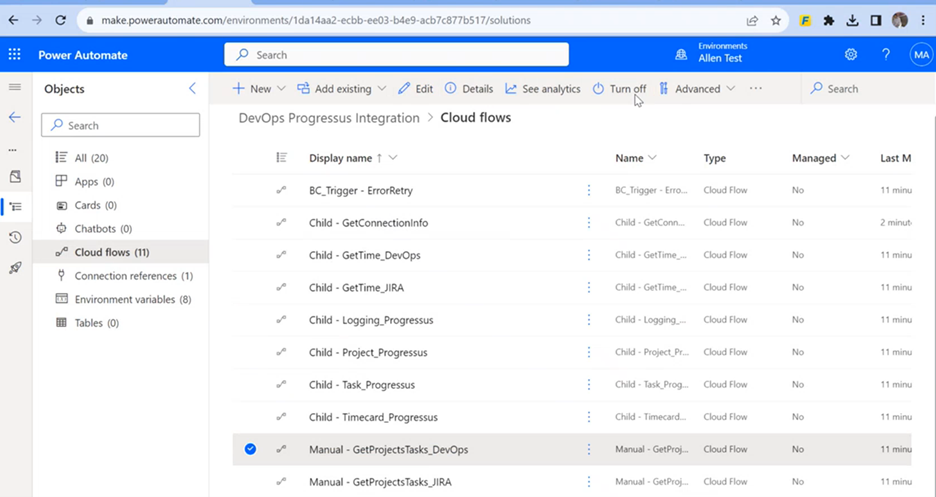
Open Solutions list again and wait for couple minutes to find out newly imported solution.
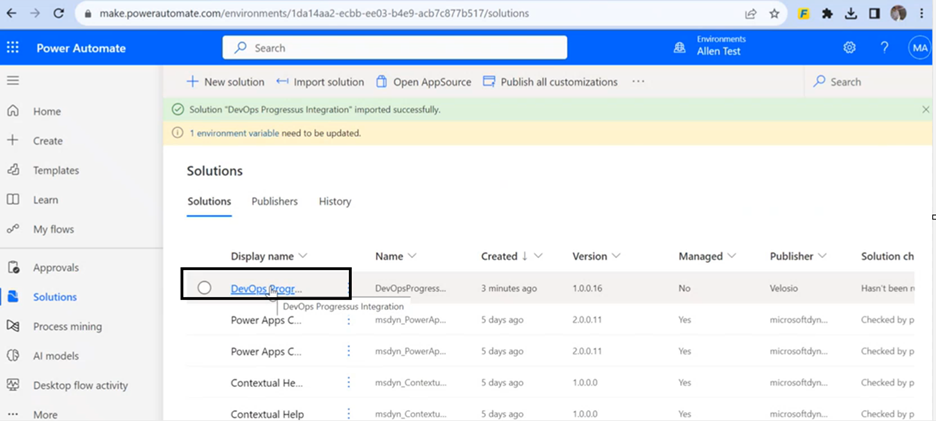
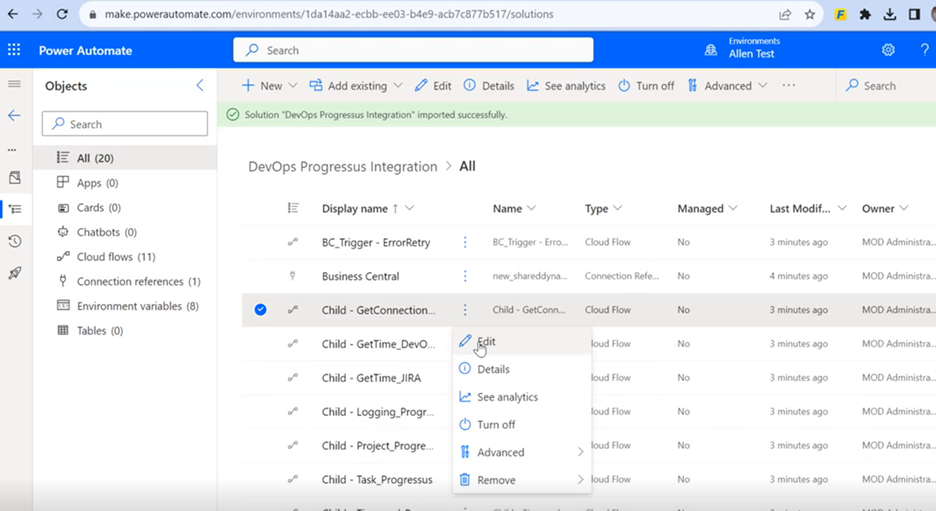
The image below shows the solution is now imported. To view the available flows, click on the Solution.

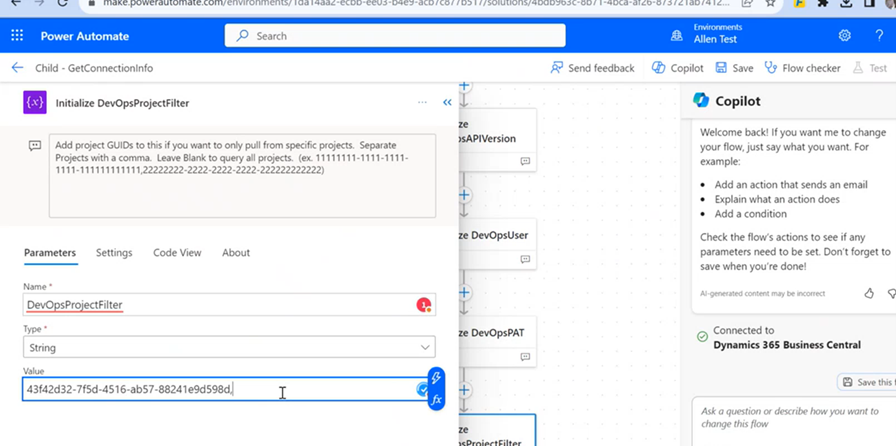
To set up a new connection, click on “Child-GetConnection” flow and click Edit.
To specify any project filter (project which integration pulls data from), specify it on the DevOps project filter available on this flow.

Click on DevOps project filter and provide the project details from DevOps.
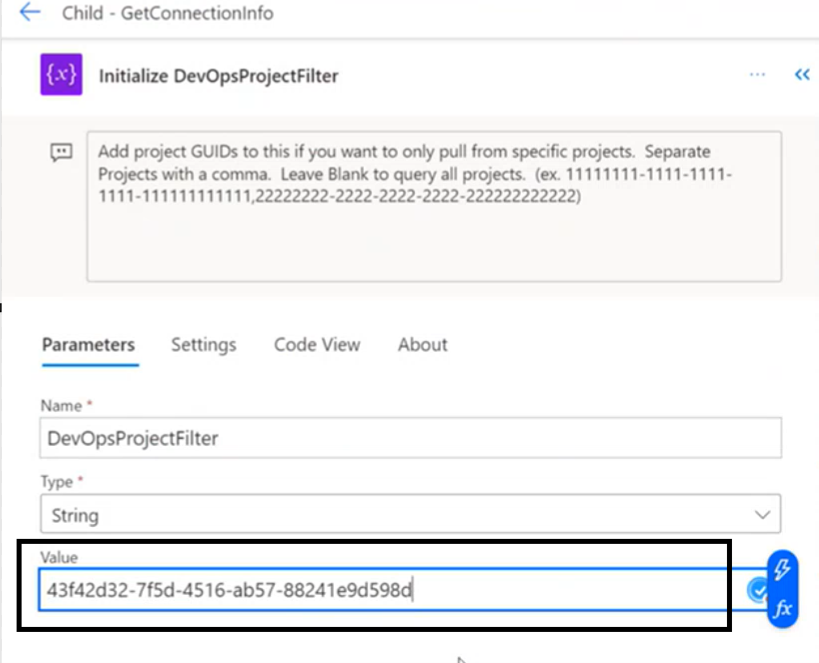
You can also filter multiple projects in the “GetConnectionInfo” flow, which will get updated on the Business Central side.
Overview: Initial Integration for Progressus Projects
Navigate to Flow.Microsoft.com and login using the O365 login that owns the solution.
Open the Solution section from the left-hand sidebar.
Select the DevOps Progressus Integration solution.
Select the GetProjectsTasks_DevOps or GetProjectsTasks_JIRA flow depending on which system you are connecting to.
Click Run in the top ribbon. You will be prompted with options. For Type of Update, select All Projects. You can leave the Minutes field blank.
Click Run Flow.
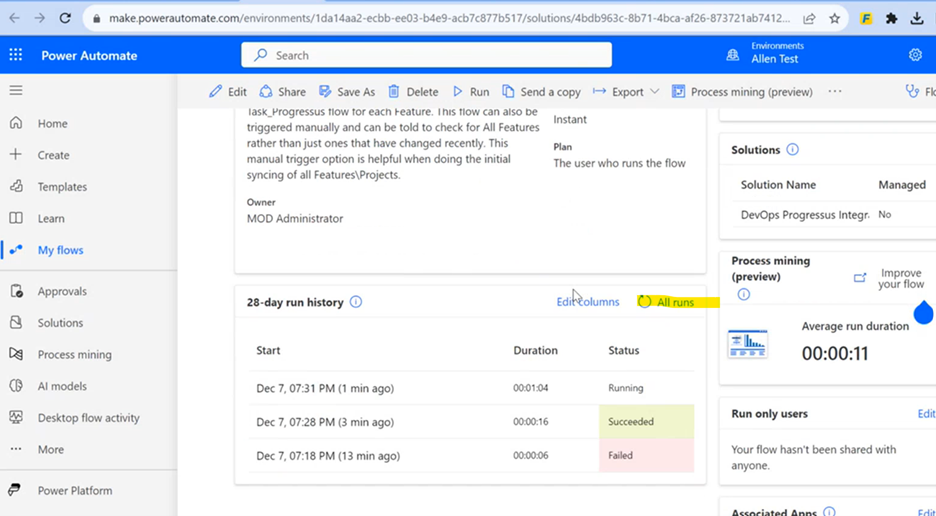
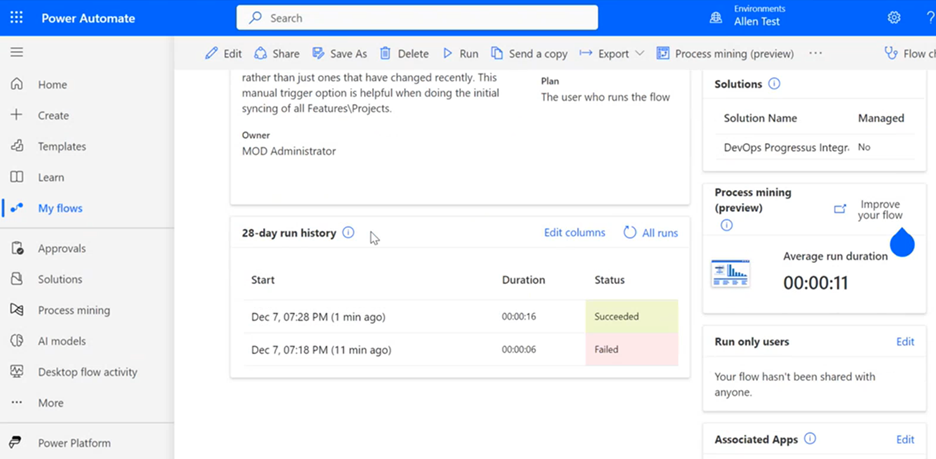
You can see the Run History of the Flow. Click the Refresh icon if it does not show its progress.
Once the Flow succeeds, the Integration Project table in Progressus should contain project data in order to match Progressus Projects with these external DevOps Projects.
Overview: Initial Integration for Progressus Tasks (Optional)
Once Progressus Projects have been paired up with the Integration Projects in Progressus, you are ready to do the initial integration for Tasks. This step is optional for if you want all features from DevOps to be created as Tasks in Progressus right away. If this initial integration of Tasks is not done, then Tasks will be created in Progressus as changes are made to Features\Tasks in DevOps.
Navigate to Flow.Microsoft.com and login using the O365 login that owns the solution.
Open the Solution section from the left-hand sidebar.
Select the DevOps Progressus Integration solution.
Select the GetProjectsTasks_DevOps or GetProjectsTasks_JIRA flow depending on which source system you are connecting to.
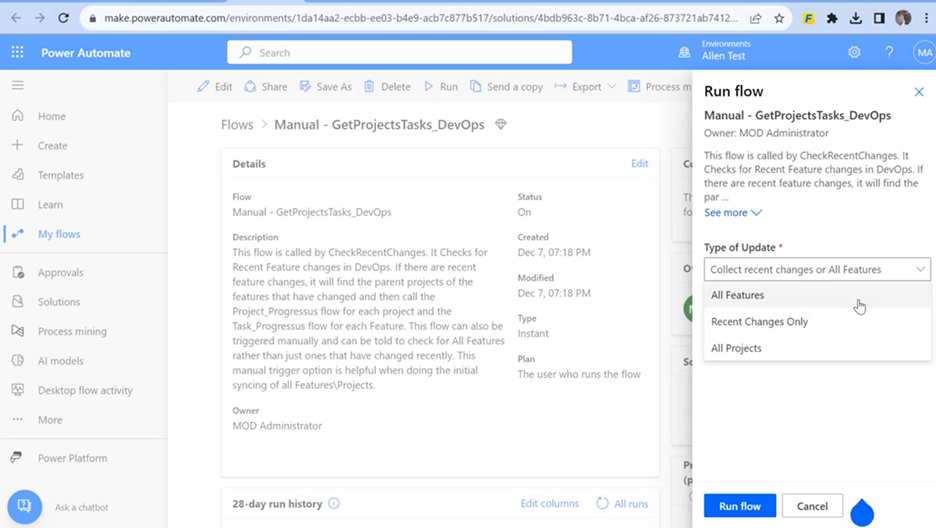
Click Run in the top ribbon. You will be prompted with options. For Type of Update, select All Features or All Epics (Features for DevOps; Epics for JIRA). You can leave the Minutes field blank.
Click Run Flow.
You can see the Run History of the Flow. Click the Refresh icon if it does not show its progress.
This Flow may take a long time to run depending on how many work items you have in your source system.
When the Flow completes, the Integration Task table in Progressus should have all Feature data from the source system. Progressus Tasks will also have been created and linked to these Integration Tasks.
Screenshots of Steps for Initial Integration
Click “Manual-GetProjectTasks_DevOps” - turn on and run the flow.
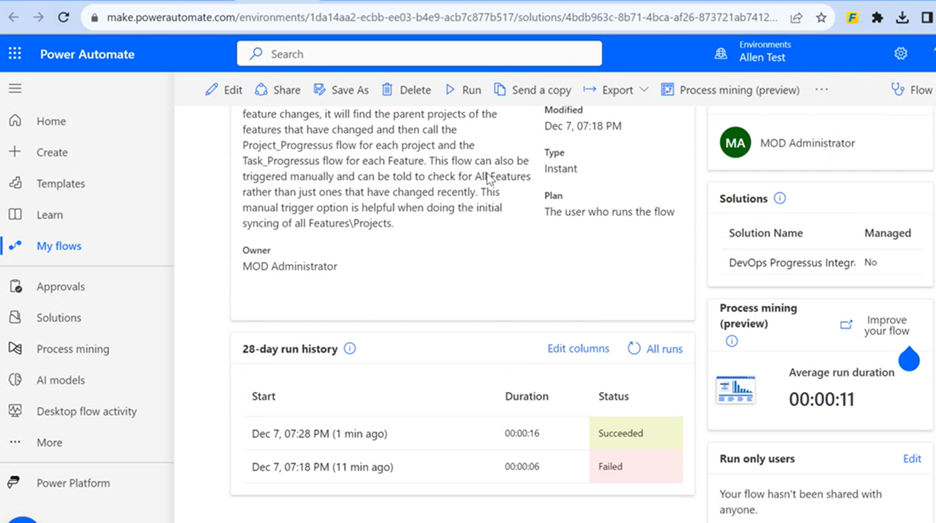
Select the type of update in the next page and click on Run flow. You can check Run History. Click Refresh on all runs to check for the recent run.
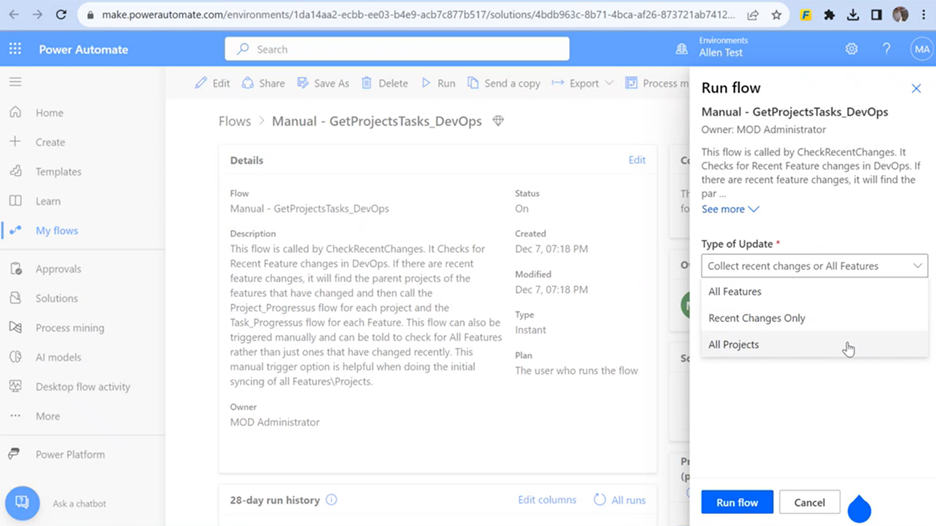
Optional: The purpose of this step is to bring all existing features of the project you linked into Business Central as Tasks on your project. If this step is not done, the features will be brought into Business Central as To update tasks, run the same flow GetProjectTasks_Devops and select Type of Update > All features as shown below.
Interval Frequency on Scheduled Work Flow
Instead of manually running each flow, there is a Scheduled Run Flow which runs all the main flows for a specified time that is user specified.
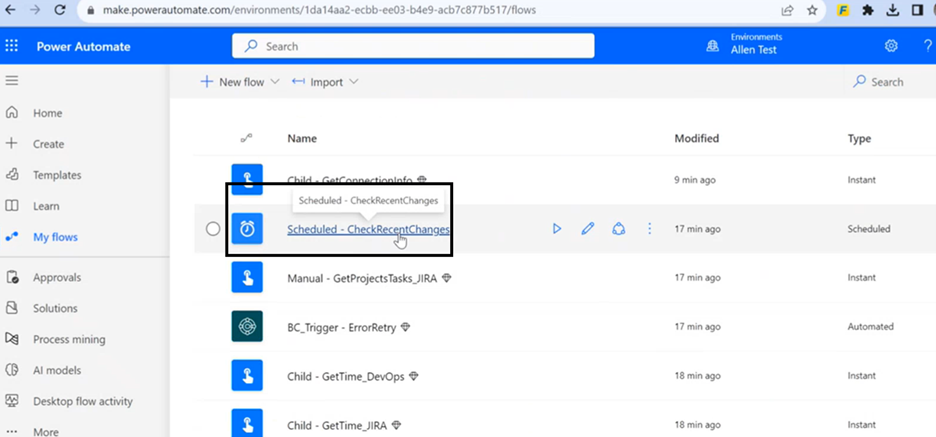
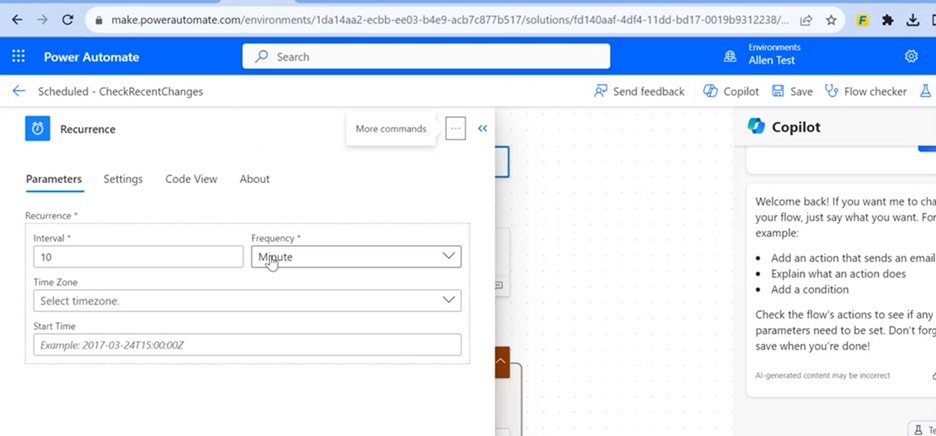
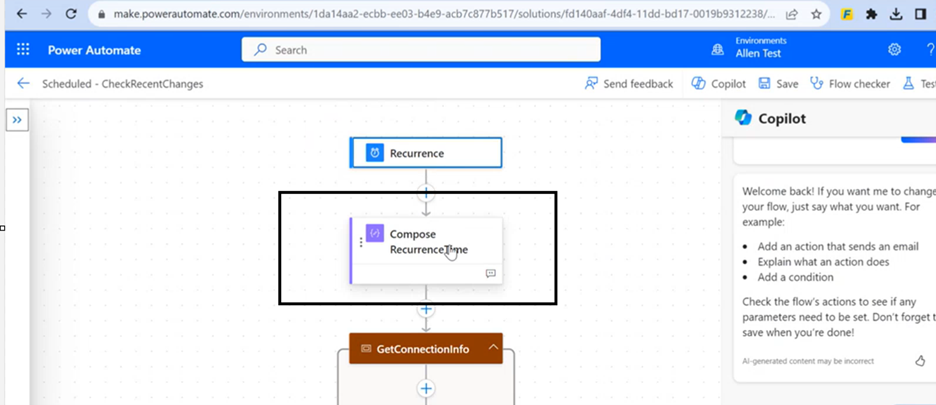
To set interval frequency on Scheduled Work Flow, edit the Flow and click Recurrence.
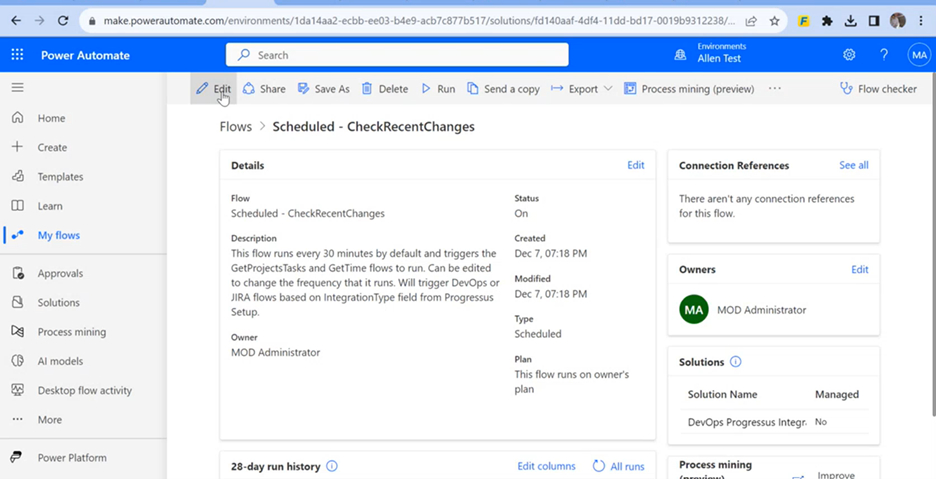
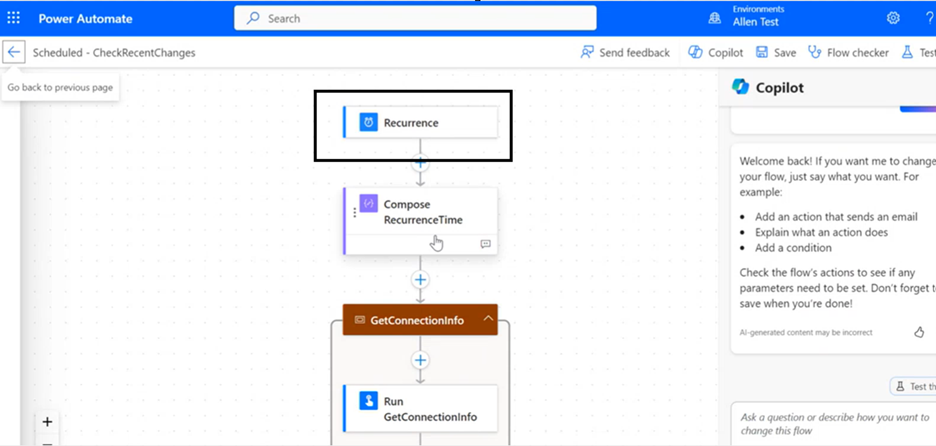
From here, you can update interval, frequency and other details which are required to make flow scheduled to run at specific times.
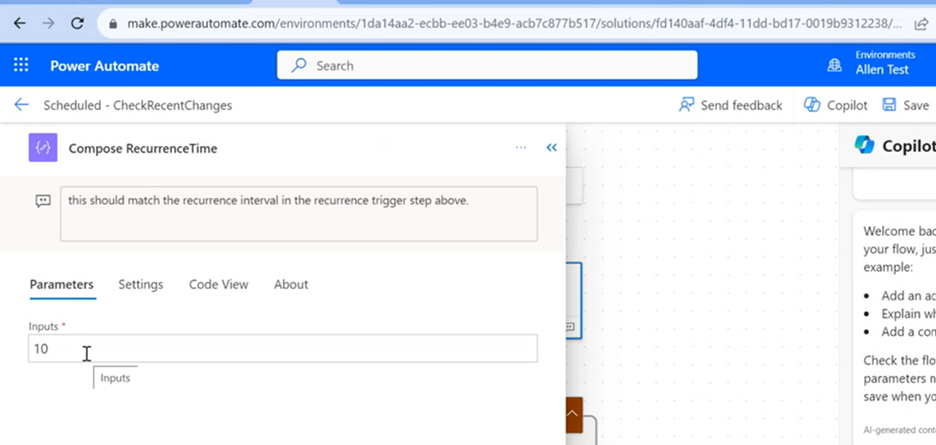
Before setting the time on a Recurrence, you will need to specify same parameters on the Compose Recurrence Time.
On the Business Central side there is an Integration log which can be searched. It shows the status of each run of the flow.
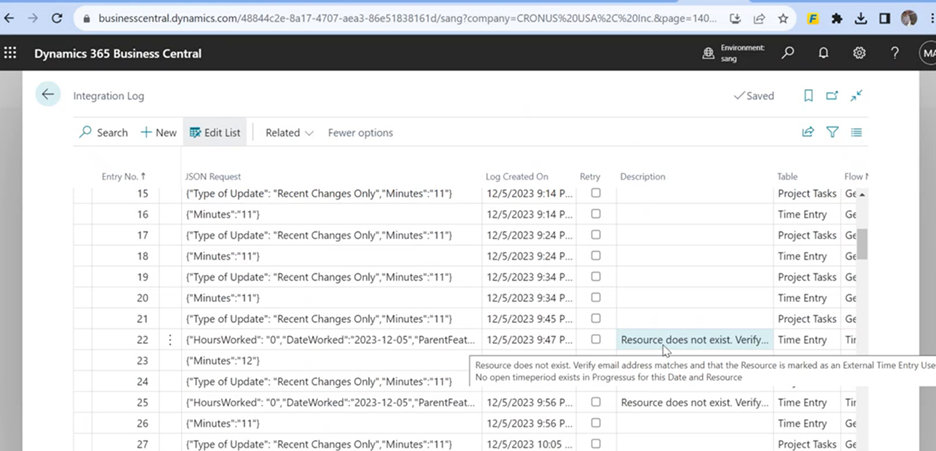
Tip
If the Integration Log shows a failed run, if you are able to resolve the issue, you can then select the Retry checkbox in the Integration Log to run it again.
Business Central Integration Setup
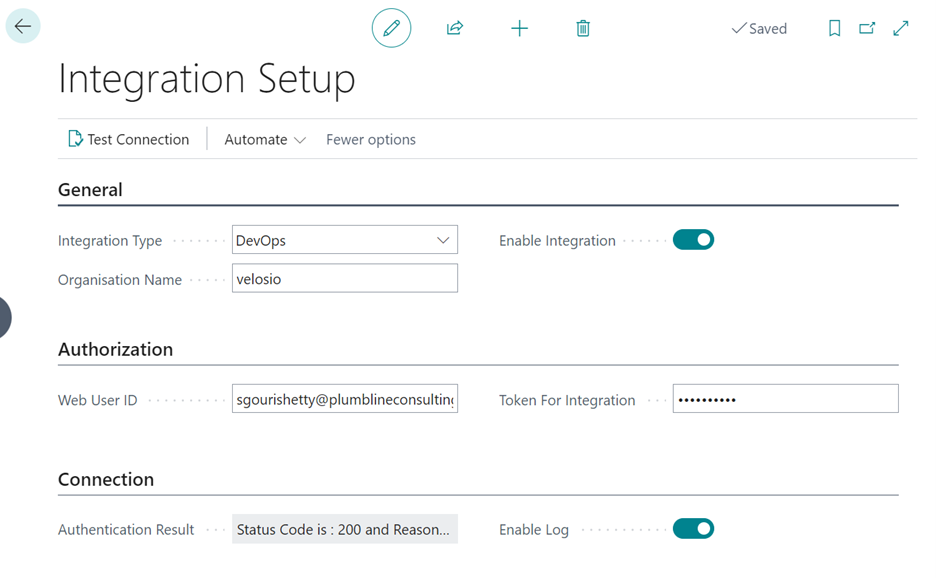
On the Business Central side, you must define below setups to update the time entries from DevOps.
In Integration Setup, you need to specify which type of integration you want to have (DevOps or JIRA), Organization Name (from DevOps), User ID and Personal Access Token (PAT of the same. Set Enable Integration Boolean to selected/true. Test the connection using Test Connection action after providing required details.
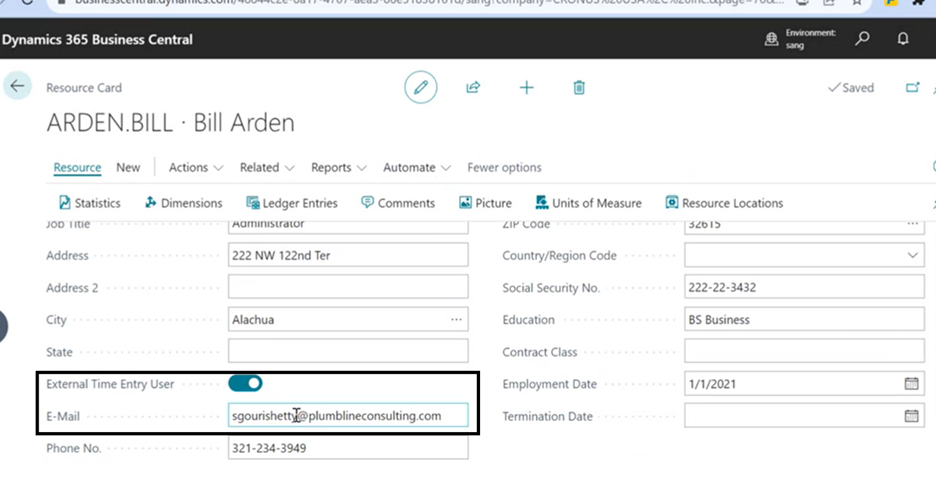
Resource
Turn on External time entry user on resource and specify email address (DevOps email).
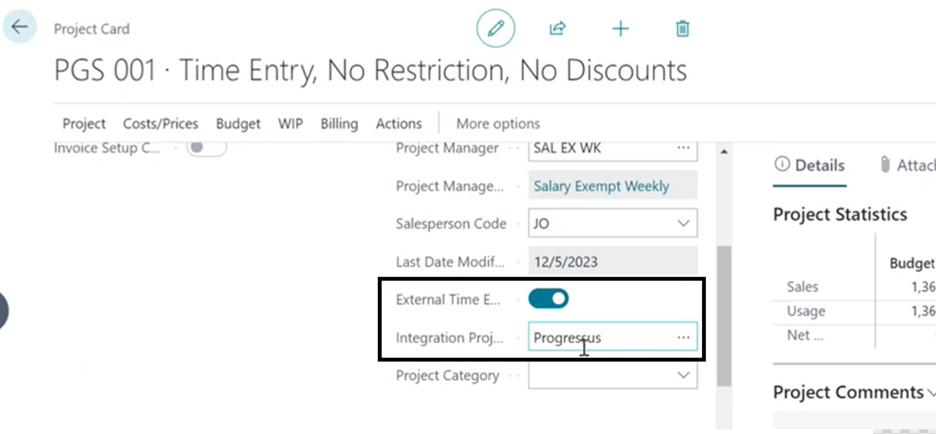
Project
Turn on External time entry on the Project Card and specify the Project No. from DevOps. You can see only projects filtered on the Get Projects flow.
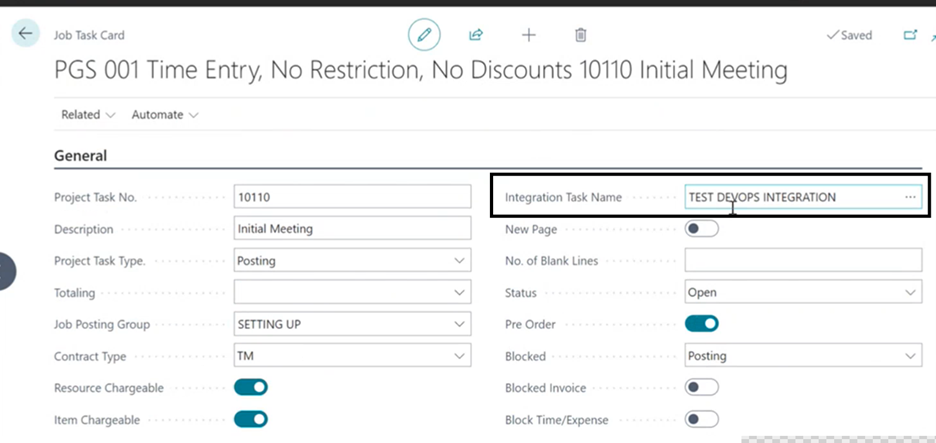
Task (optional)
Turn on External time entry on Project Task and specify feature from DevOps on Integration task name. You can see features created under the DevOps project specified.
Note
If a Task is not specified, the integration would create a new Task in Progressus if any time is entered through the DevOps feature. If there are Tasks in Business Central that already existed before the integration which should be tied to an existing DevOps feature, you will need to use this process to link them.
Retry Error Log
If errors occur during any of the Power Automate flow operations, the error will be logged in the Integration Log in Progressus. The log contains the data that was passed to the flow at the time that it failed. From the log in Progressus, you can check the ‘Retry’ checkbox if you would like to retry that operation. This retry option is mostly intended for when data needs to be adjusted on the Progressus side rather than on the source side. Source side changes should be picked up by the regularly scheduled flows. For example, if the Time to Timecard process fails to find a Time Period in Progressus based on the Assigned user and date from the source an error will be logged with a Status of Failure. Once a valid Time Period has been created in Progressus, the log can be retried. Assuming the log succeeds after being retried, the Status of the record will be updated to Success.
Setup Notes
Jira
This integration uses email addresses to match a Progressus User with a user in the source system. In order to retrieve user email addresses from JIRA, each user that wants to use the integration will need to allow their email address to be retrieved. To do this, Open Account Settings and set the Email Address option to ‘Anyone’.
See Also
DevOps Progressus Integration Extension/Apps
Developer Guide - Introduction to APIs Used In DevOps-Progressus Integration Project