Progressus Integration Points with Business Central Field Service
Overview
The Progressus integration with Microsoft Dynamics 365 Field Service is particularly valuable for organizations that provide professional services. It offers a seamlessly integrated solution for managing service tasks, usage, and financial transactions to benefit service technicians, managers, and finance teams. It is a powerful solution for managing work orders and Resource and Item usage in Field Service and efficiently invoicing and fulfilling them in Business Central and Progressus.
The integration of Progressus with Dynamics 365 Field Service offers the following benefits:
- Enhances operational efficiency and streamlines processes.
- Facilitates automation, reducing the need for manual tasks.
- Synchronizes Field Service Work Orders and financial transaction data in Progressus by generating Progressus Project Journal Entries for completed Field Service Work Order Items. The Progressus Project Journal Entries can be posted and billed via Invoice Suggestions.
- Ensures consistency in Project Task and Resource information through improved management and automated creation of Resources, Project Tasks, and Project Journal Entries in Progressus, directly from Field Service Work Orders and Bookable Resources.
Dataverse, Customer Engagement (CE) and Field Service Environment Prerequisites
You must have a Dataverse environment with Microsoft Dynamics 365 Customer Engagement and Dynamics 365 Field Service configured.
The following steps need to be taken to set up an integration between Progressus, Dataverse, Microsoft Dynamics 365 Customer Engagement (CE) and Microsoft Dynamics 365 Field Service for the creation of Progressus Resources, Progressus Project Tasks, and Progressus Journal Entries.
Step 1: Install the Progressus Field Service Integration app
The Progressus Field Service Integration app can be obtained through the Progressus online Request Form. The download requires Progressus approval and is available via this link: Progressus Online Request Form
Step 2: Use Power Platform to create a Dataverse environment
Create and manage environments in the Power Platform admin center
Step 3: Run Assisted Setup for Dataverse within Business Central
- Choose the
 icon, enter Assisted Setup, and then choose the related link.
 - Choose Set up a connection to Microsoft Dataverse to start the Assisted Setup guide.
- Fill in the fields, as necessary.
For detailed information on connecting to Microsoft Dataverse, see: Connect to Microsoft Dataverse
Step 4: Assisted Setup for Dynamics 365 Sales Integration
Dynamics 365 Sales Integration is required for Dynamics 365 Field Service integration. For information on installing Dynamics 365 Sales app, see: Integrating with Dynamics 365 Sales - Business Central | Microsoft Learn
To integrate with Microsoft Dynamics 365 Field Service, the guide provides an optional step that can help. To learn more about integrating with Field Service, go to Integrate with Microsoft Dynamics 365 Field Service
- Choose the
icon, enter Assisted Setup, and then choose the related link.
- Choose Set up integration to Dynamics 365 Sales to start the assisted setup guide.
- Fill in the fields, as necessary.
- When prompted to install Field Service Integration App, proceed with that installation.
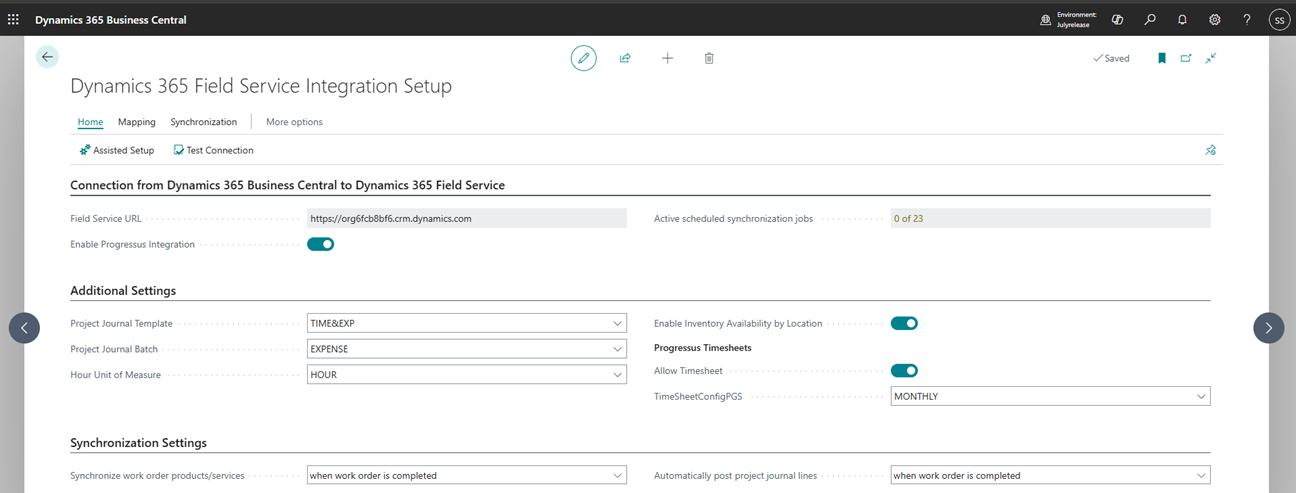
Step 5: Configure Dynamics 365 Integration Setup within Business Central
- Choose the
icon, enter Dynamics 365 Field Service Integration Setup, and then choose the related link.
- Populate field settings in Additional Settings and Synchronize Settings FastTabs. Progressus integration of Resources uses Progressus Timesheet fields Allow Timesheet and TimeSheetConfigPGS to default values for the new Resource created in Progressus.
Connection from Dynamics 365 Business Central to Dynamics 365 Field Service FastTab
| Field Name | Description |
|---|---|
| Enable Progressus Integration |
Specifies if the connection to Dynamics 365 Field Service is enabled. When selected, the user will be prompted to sign in to Dataverse with an administrator account. The account will be used to install and configure applications and components that the integration requires. |
Additional Settings FastTab
| Field Name | Description |
|---|---|
| Progressus Timesheets |
|
| - Allow Timesheet | Specifies, that if selected (true), the TimeSheet/Expense Sheet field on the created Progressus Resource Card will be set to 'True'. The TimeSheet/Expense Sheet field specifies if a Resource uses a Progressus Timesheet to record time allocated to various Tasks. |
| - TimeSheetConfig | Specifies the Configuration Code to which the created Progressus Resource will be assigned. Timesheet Configuration Codes allow for a variety of general settings such as starting day for the work week, time validation, and Timesheet settings for length of the Timesheet Period and approvals. Expense sheet options are also located on the Timesheet Configurations page. |
Run Synchronization Process
The final step is to run the Business Central Integration Synchronization Jobs process.
For information on setting up and running Synchronization Jobs in Business Central, see:
Synchronizing data in Business Central with Microsoft Dataverse
Integration Table Mappings
The Integration Field Mapping List for "Resource-BookableRsc” shows the Bookable Resource field mappings between Field Service and Business Central. These are the fields to which data will be mapped between Field Service and Business Central following synchronization.

For information on the Synchronization Jobs process for Table Mappings in Business Central, see:
Manually Synchronize Table Mappings
Synchronize Individual Table Mappings
Create Progressus Resources from Field Service Overview
- A Bookable Resource in Business Central Field Service creates a Bookable Resource in Business Central that can create a Resource in Progressus.
- Progressus Integration fields are added to Dynamics 365 Field Integration Setup that default the Allow Timesheet and Time/Expense Configuration Code on the Resource Card when the Resource is created in Progressus.
-The Field Service Hourly Rate specified for the Bookable Resource in Field Service generates the corresponding Resource Cost record in the Resource Cost page within Progressus for the associated Progressus Resource.
Create Progressus Resources from Dynamics 365 Field Service Bookable Resources
In Dynamics 365 Field Service, Active Bookable Resources, click New.
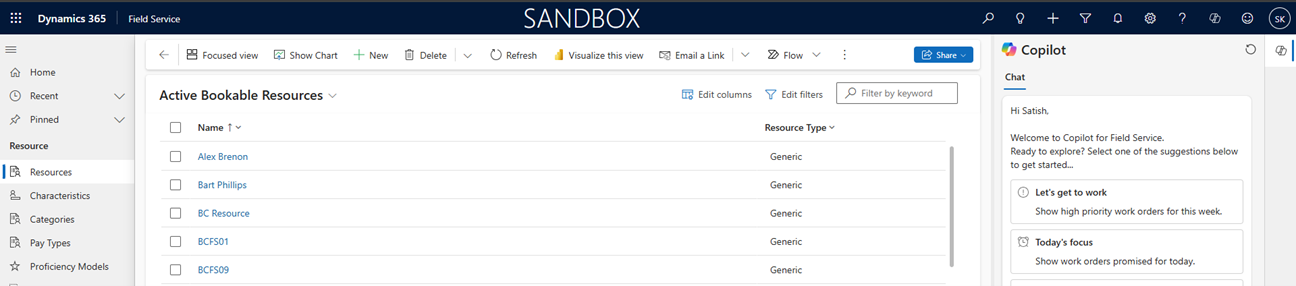
Resource Type: Select 'Generic'
Name: Specify the Resource Name
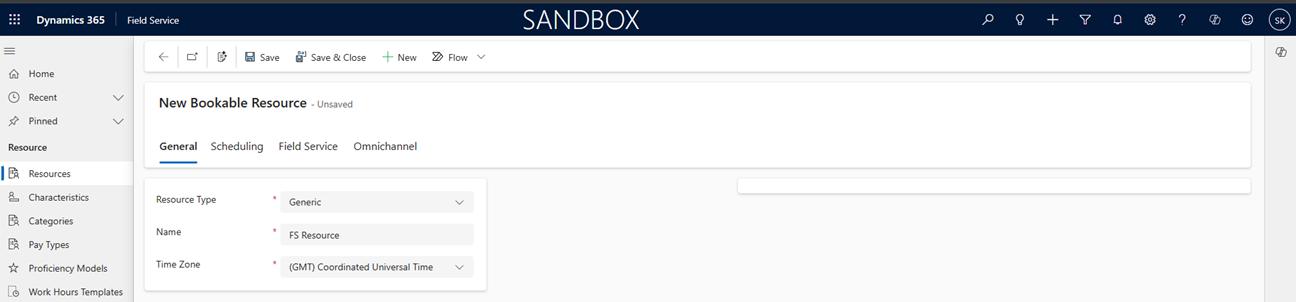
Add an Hourly Rate

After Synchronization runs successfully, the Field Service Resource Record is created in Bookable Resources - Dynamics Field Service page in Business Central.
Click Create in Business Central to create the Resource Card in Progressus.
 :
:The Resource is now available in Progressus.
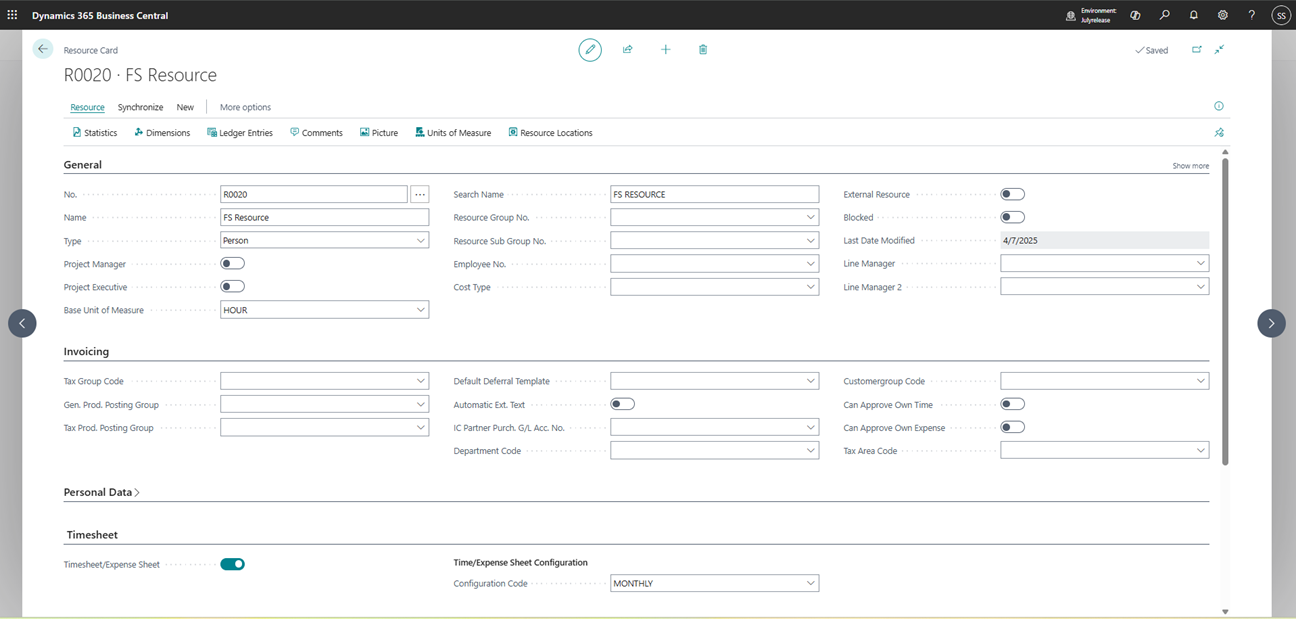
The Resource Cost is also created.

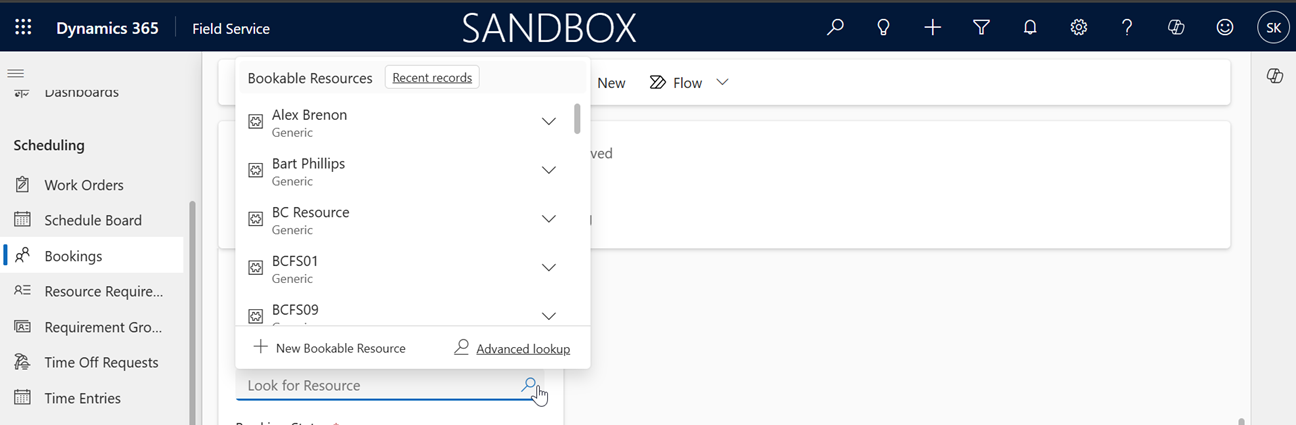
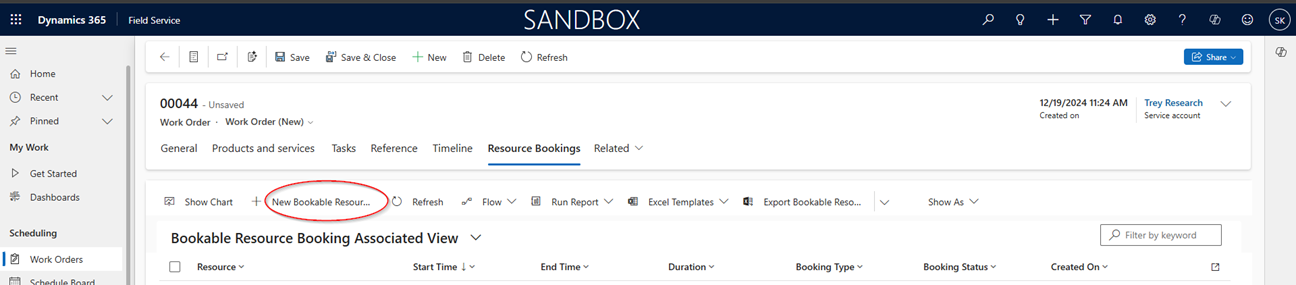
Bookable Resources can also be created from the Work Order page. Click Resource Bookings tab and click the General tab.
Complete fields in the form for the new Bookable Resource. If the Bookable Resource does not exist it can be created from within the Resource lookup.
Create Progressus Project Tasks from Field Service Work Orders
The Field Service Work Order is used to create Work Orders for a Project and Task. If the task does not exist in Progressus, the task can be created on the Field Service Work Order page:
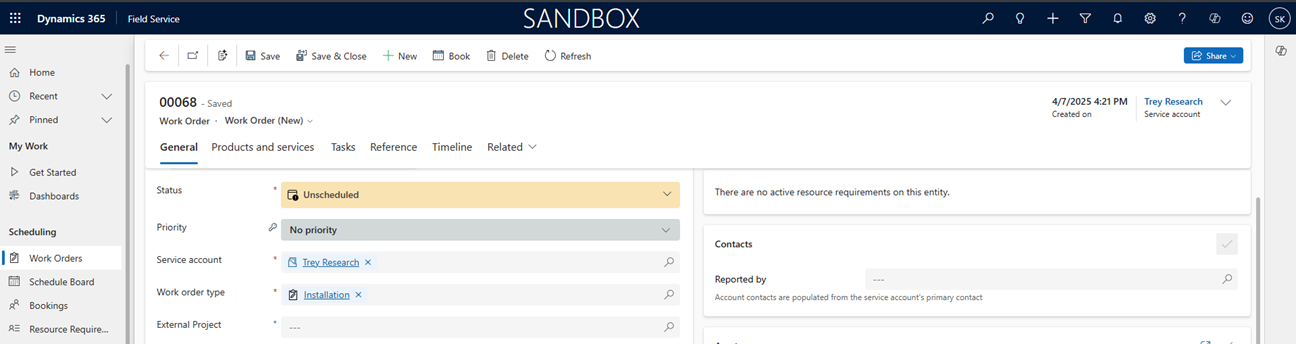
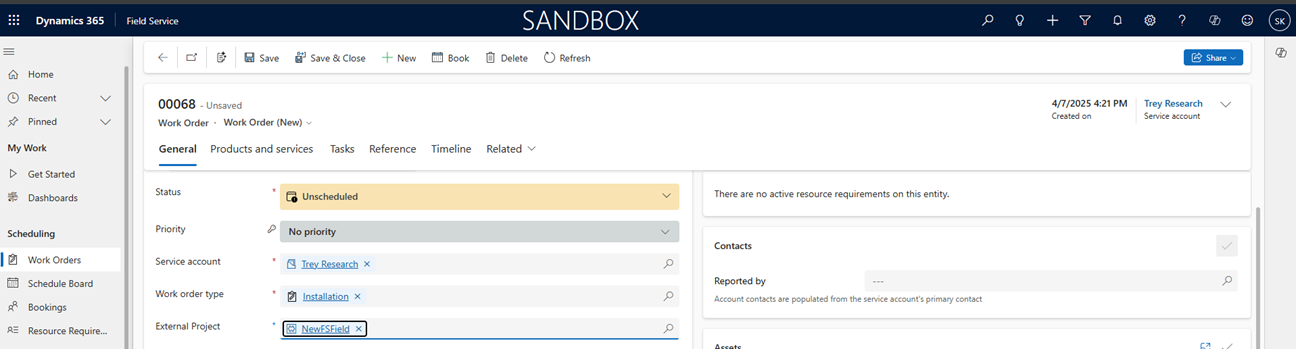
From the Work Orders page, click New.
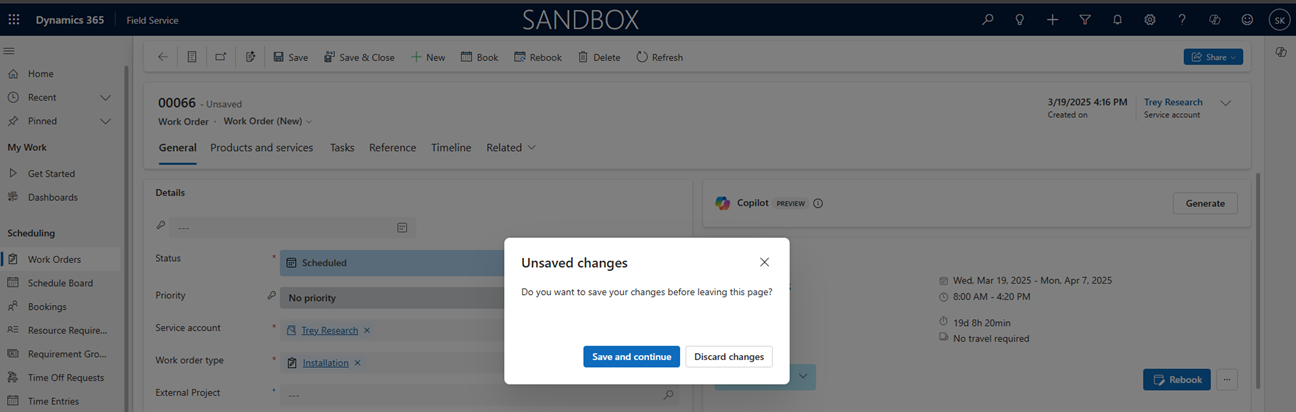
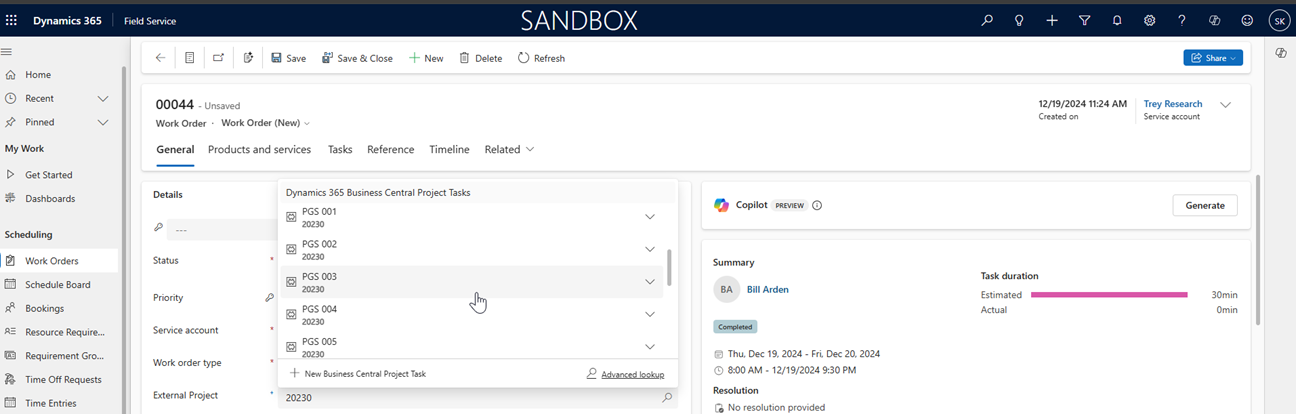
Enter the Service account number, click External Project and then click New Business Central Project Task.
Click Save and continue
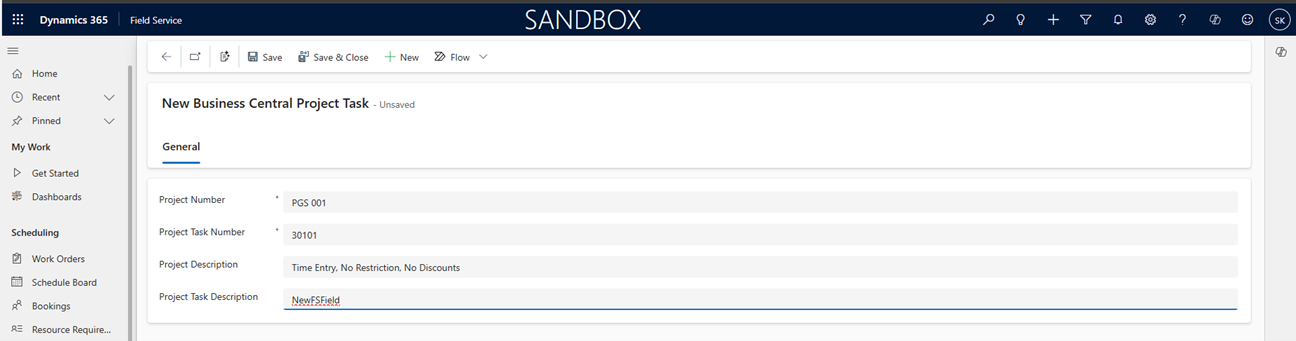
In the New Business Central Project Task page, add the following information:
- Project Number: Enter the Progressus Project No.. If entered incorrectly, the synch to Business Central will result in an error.
- Project Task Number: Enter a new Task number to be created.
- Project Description: Enter the Business Central Project description. This description does not impact the synch process.
- Project Task Description: Enter information to be used the description of the Task in Progressus.
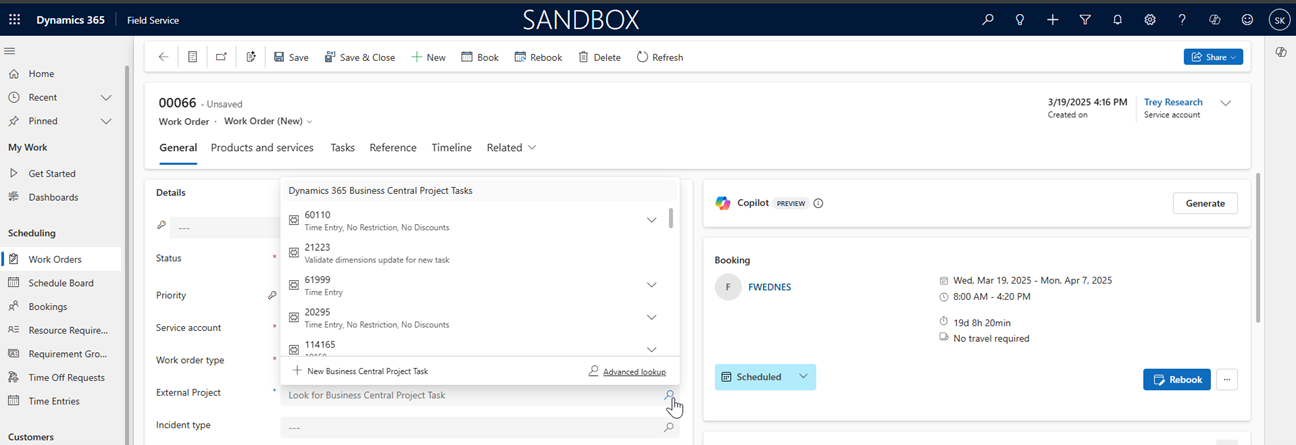
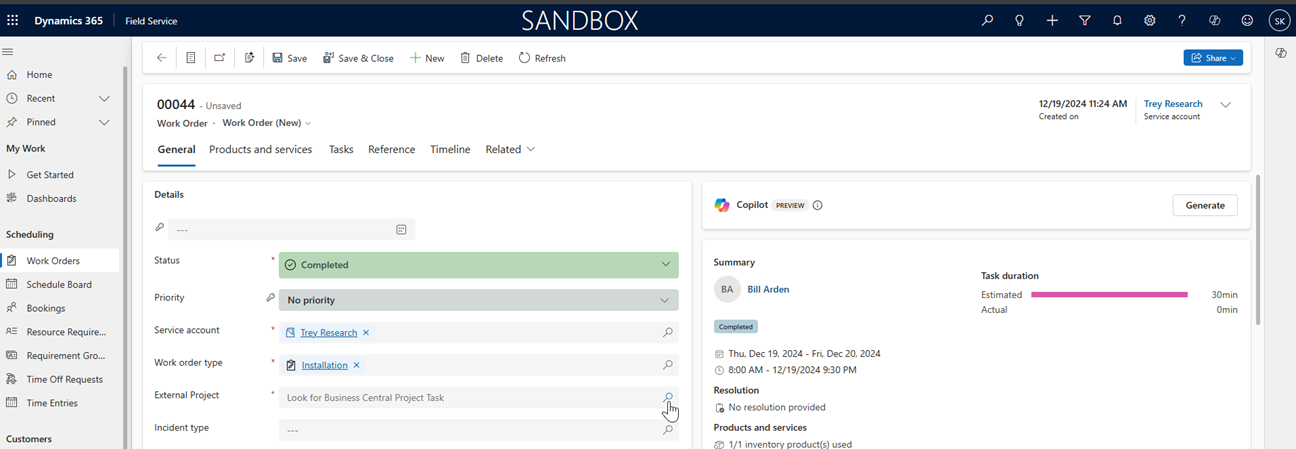
Select the new task that was created by clicking the External Project field on the Work Order (Look for Business Central Project Task). The list of current Tasks for this Business Central Project Tasks displays.
Click Advanced Lookup in the New Business Central Project Task field.
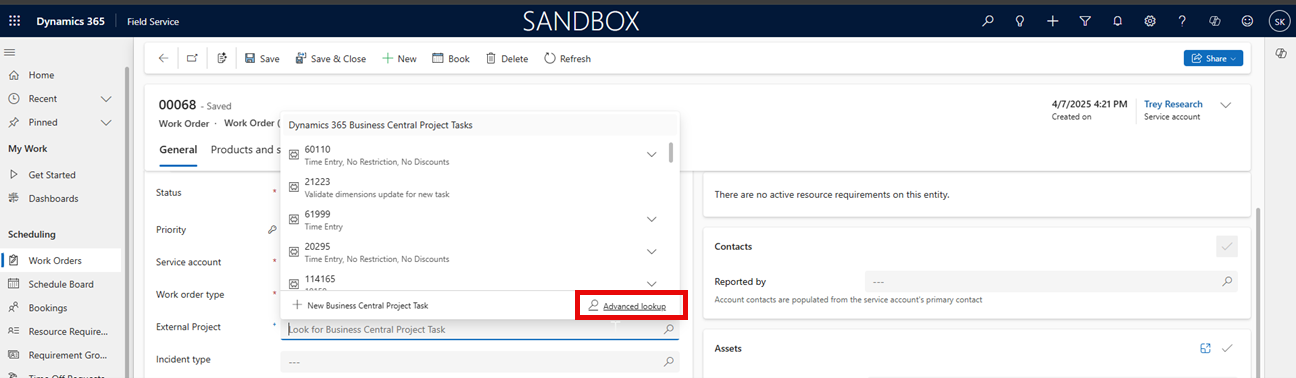
Enter the Task No. just created, select it from the list and click Done.

The new Task is inserted into the Work Order.
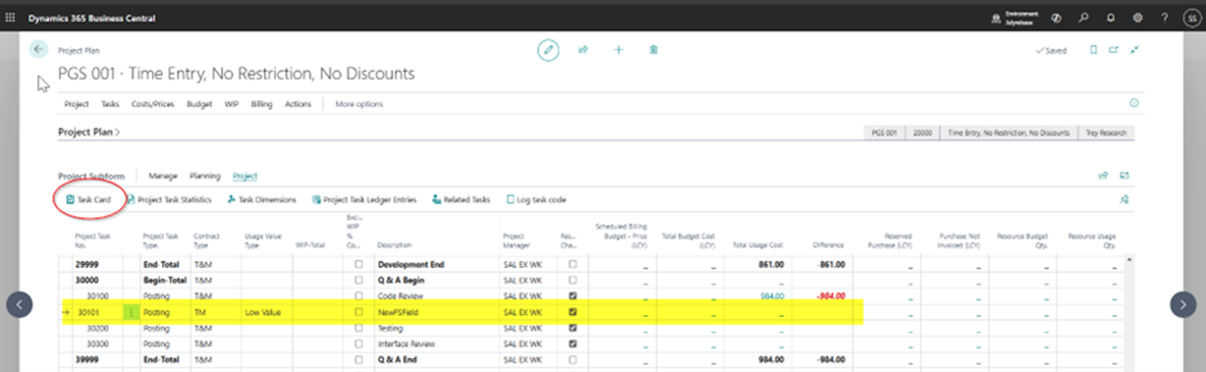
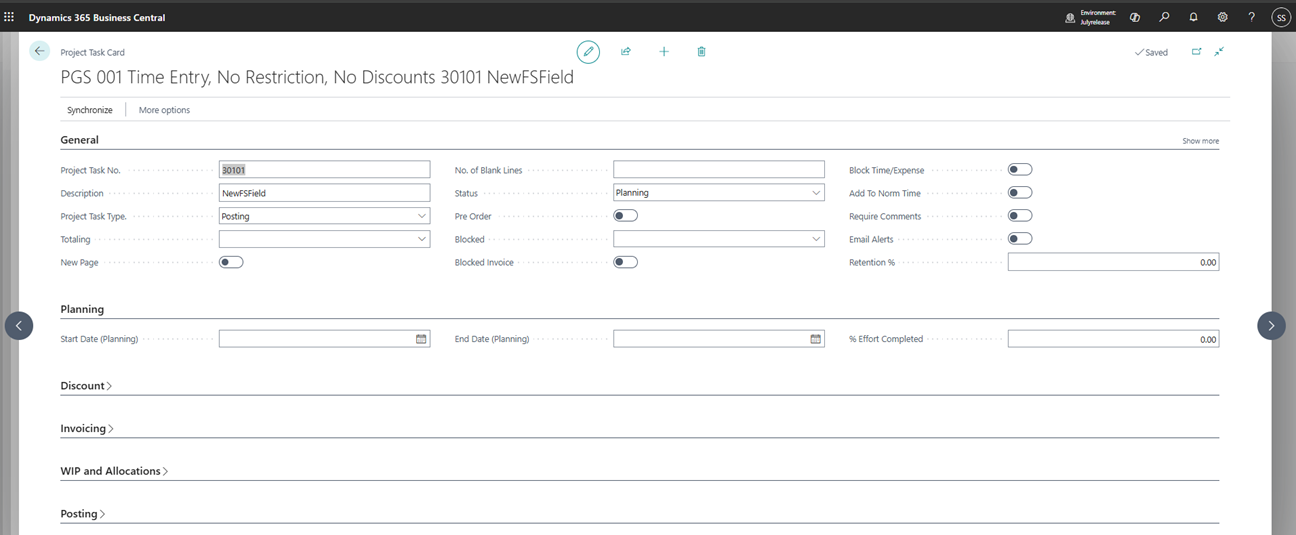
Once the Synchronization completes successfully, the Project Task will be created and displayed in the Progressus Project Plan.
Create Progressus Project Journal Entries from Field Service Work Order Items
Work Orders will create Project Journal transactions in Business Central. The setting defined for field Synchronize Work Order Products/Services in the Dynamics 365 Field Service Integration Setup page will determine when the Project Journal Lines are created.
Based on the configurations in the Dynamics 365 Field Service Integration Setup page, when Work Orders include Products, the consumption details are transferred and recorded through a Project Journal in Business Central.
Field Service Work Order Items can create Project Journal Entries in Progressus.
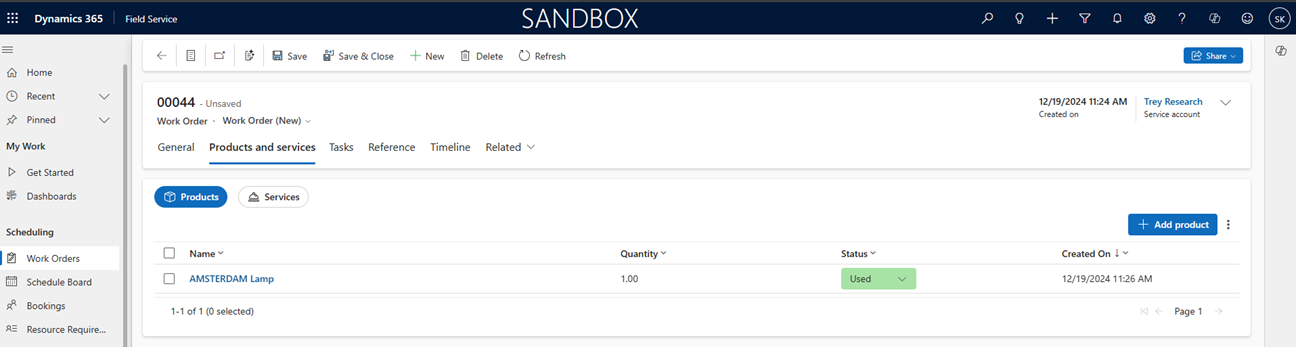
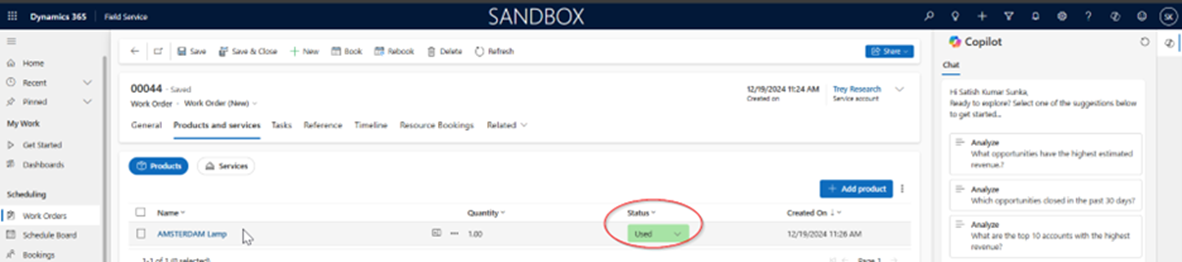
When an Item is placed on a Field Service Work Order and the line Status is set to 'Used', the Work Order is set to 'Completed,' and the Synchronization Integration process runs successfully, new Progressus Project Journal Entries are created.
In this example, the Business Central Item used has Quantity on Hand of '2', Standard Cost of $42.80 and the Unit Price is $54.90.

In the Field Service Work Order, click New.

Enter the Service account and click the lookup icon for External Project.
Select Project PGS 001 and Task code 20230.
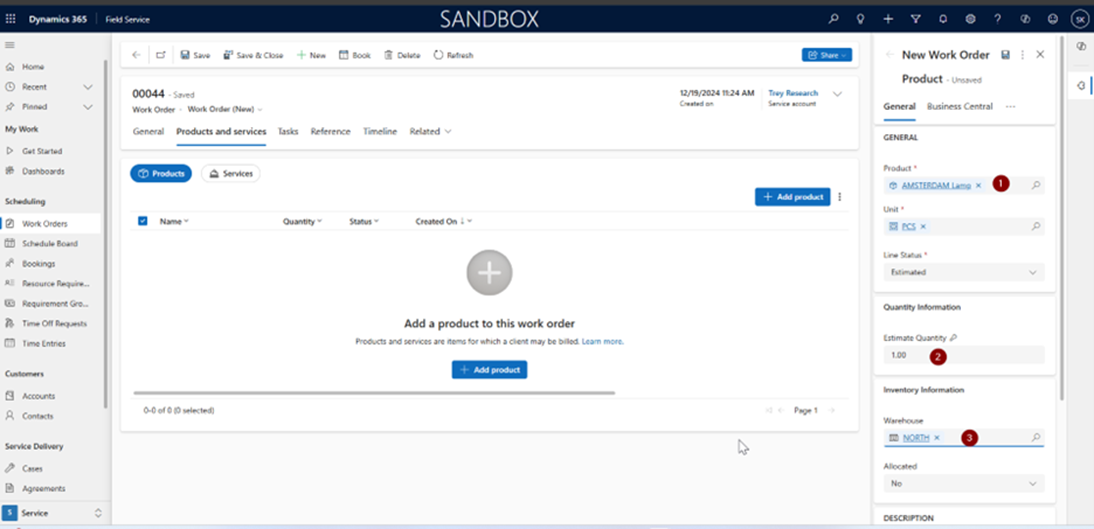
From the Products and services tab, click Add product.

Select the Product, Estimate Quantity, and the Warehouse.
Note
The Warehouse is not required if Locations are not used.
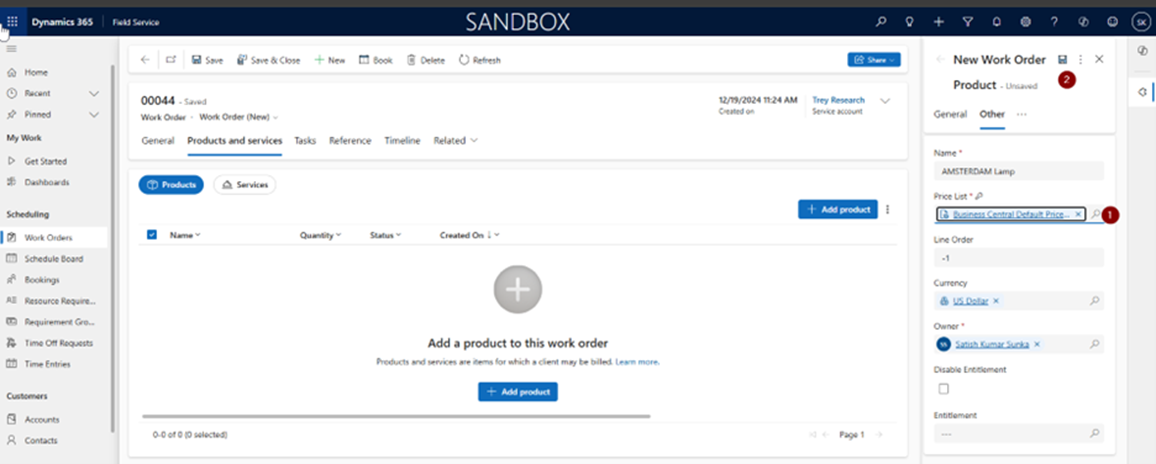
Click Other tab, select the Price List ('Business Central Default Price List') and click Save.
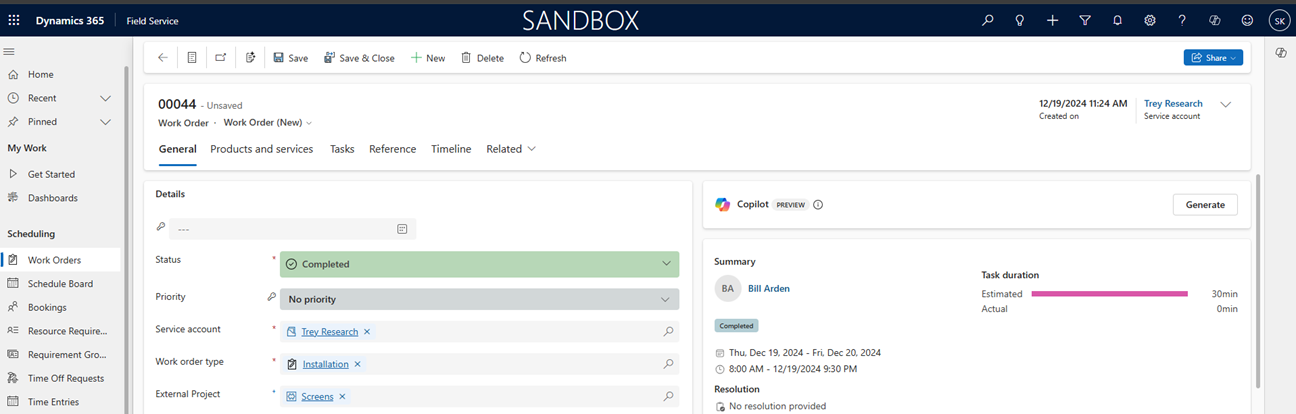
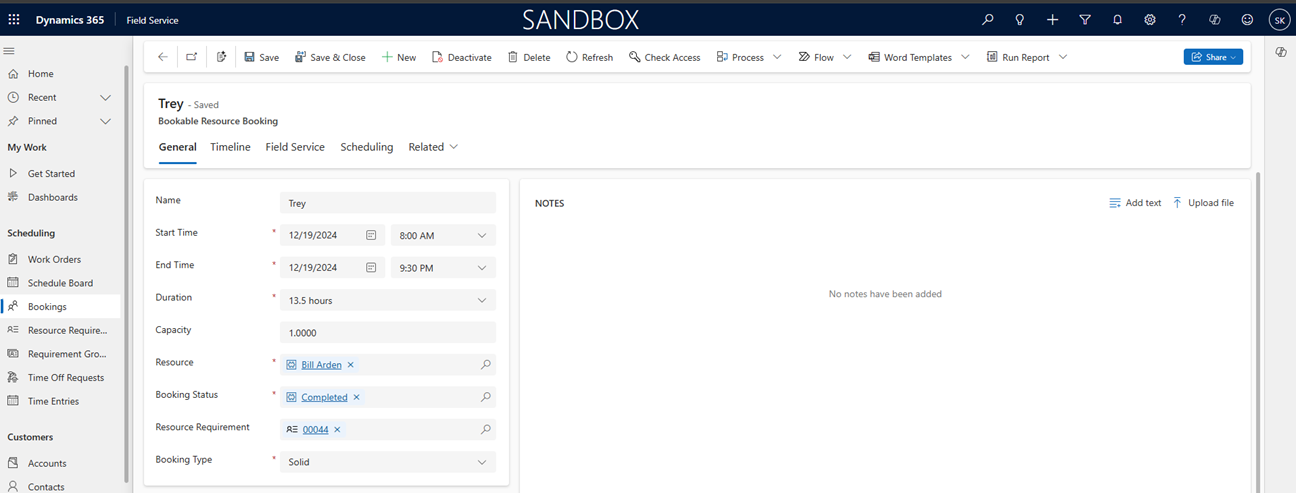
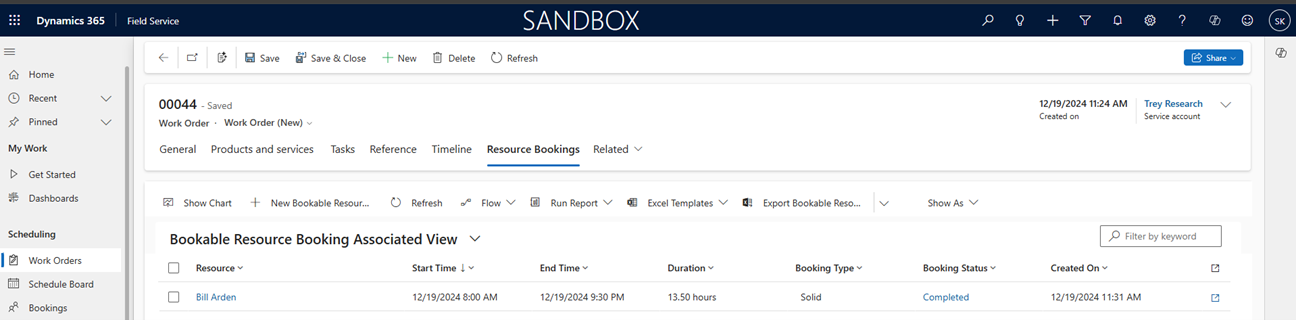
In this example, we also added a Bookable Resource for Bill Arden.
Enter details and click Save & Close.
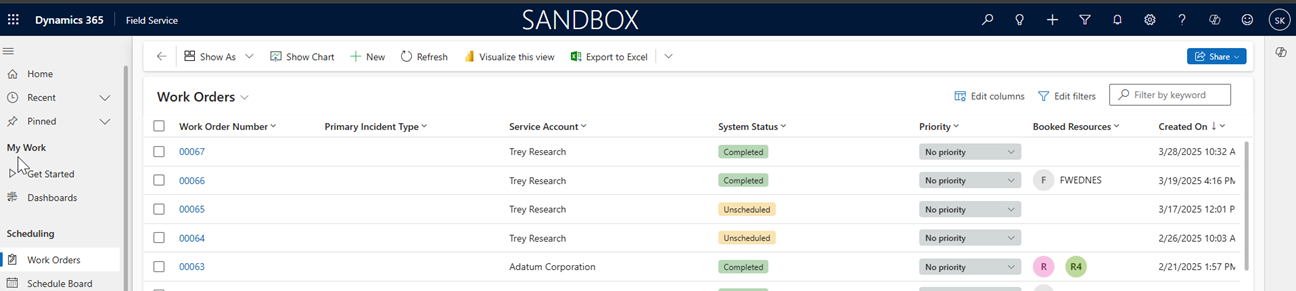
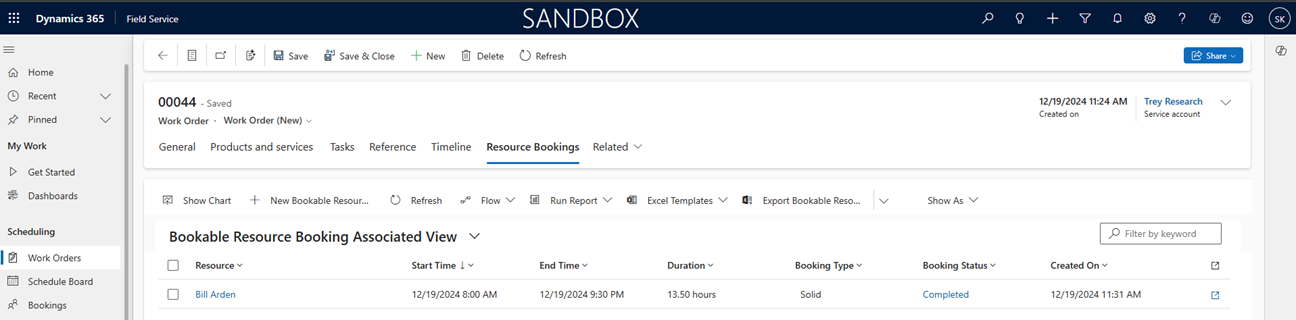
The Bookable resource is added to the Work Order.
Change the Work Order Status to 'Used'.
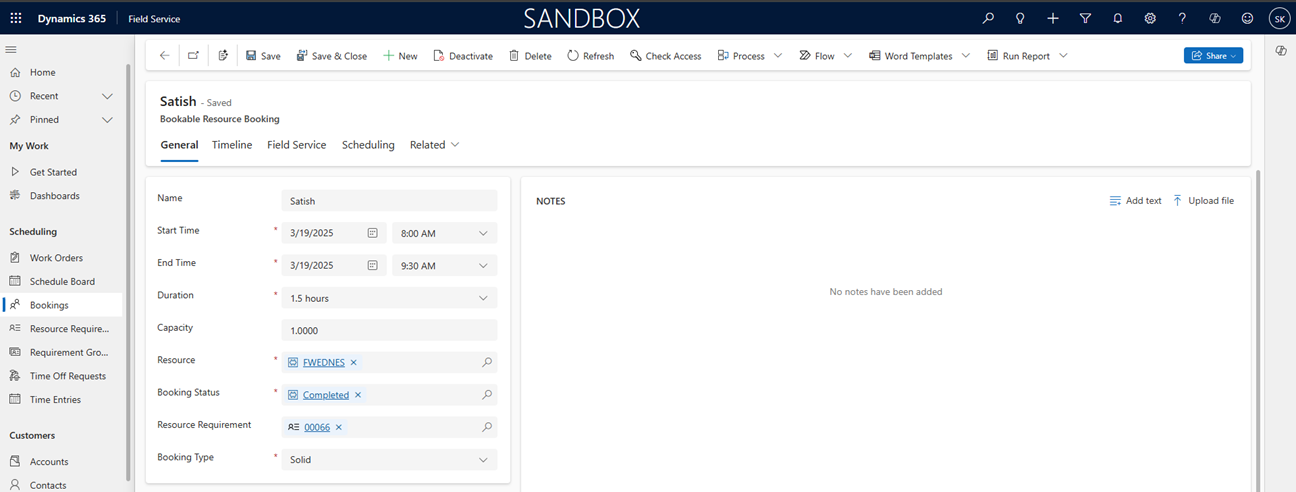
Change the Bookable Resource Booking Status to 'Completed'.
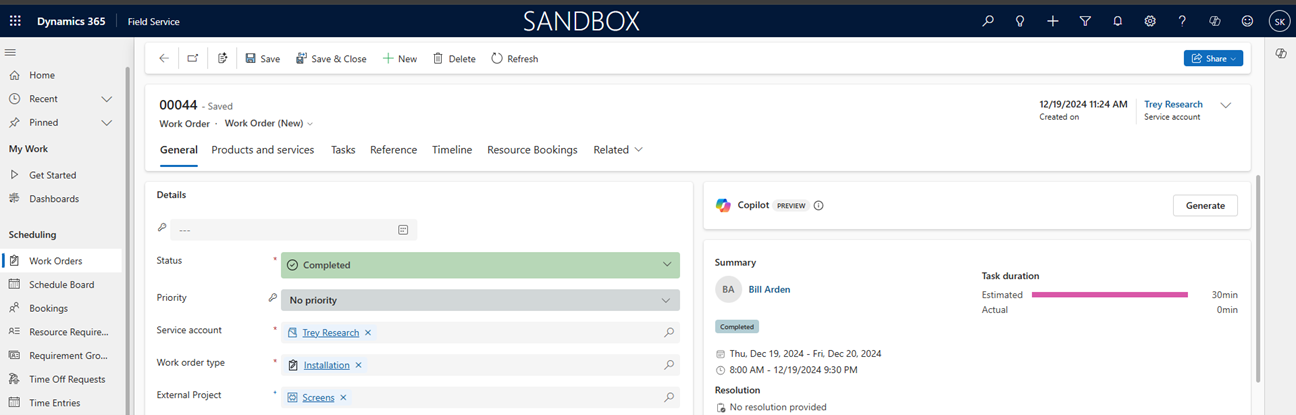
Change the Work Order Status to 'Completed.'
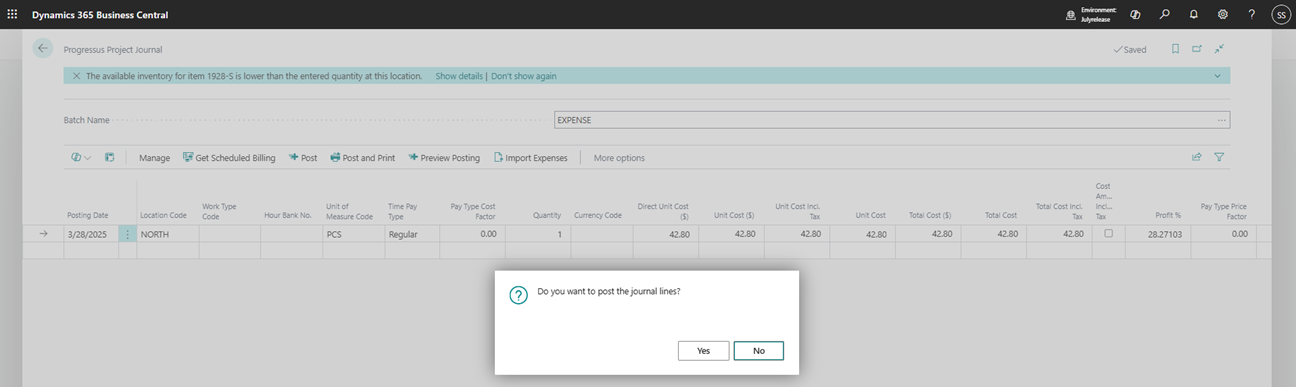
Once the Synchronization process completes successfully, the record from the Work Order is inserted into a Progressus Project Journal line.

The Cost and Price are updated from the values on the Business Central Item Card.
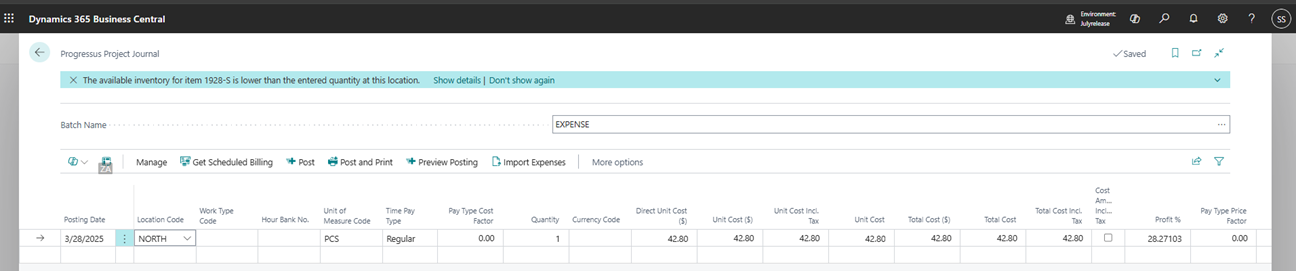
Post the Project Journal.
View the Project Ledger Entry:

