Outlook add-in for Progressus

Business Central introduces the ability to manage business interactions directly in Microsoft Outlook.
The Progressus add-in for Outlook enables:
- Time entry in Outlook to instantly update the Timesheet in Progressus
- Project Budget Entries to be sent to Outlook calendar with pre-filled data for time entry.
- Outlook calendar bookings shown in Progressus for workload and availability overviews.
Video
Outlook Integration to Progressus - This video covers installing and using the Outlook Integration to Progressus Timecard Entry.
Installation of the Outlook add-in
With the installation of Progressus, the add-in should automatically be added to the list of Outlook add-ins.
To verify this, choose the search icon, enter Outlook Add-In Management, and then select the related link to see a complete list of installed Office add-ins.
If the Outlook Integration for Progressus is not displayed, choose the Reset Default Add-ins action.
Deploy the Outlook Integration for Progressus add-in the same way as the standard Business Central add-ins.
For general documentation about deploying Outlook add-ins, please see Business Central Add-in for Outlook at docs.microsoft.com
Important
For information on registering a new application, and obtaining the Application ID (client) and Directory ID (tenant) that are needed to complete setup of the Outlook Integration, see this article: Quickstart: Register an application with Microsoft identity platform
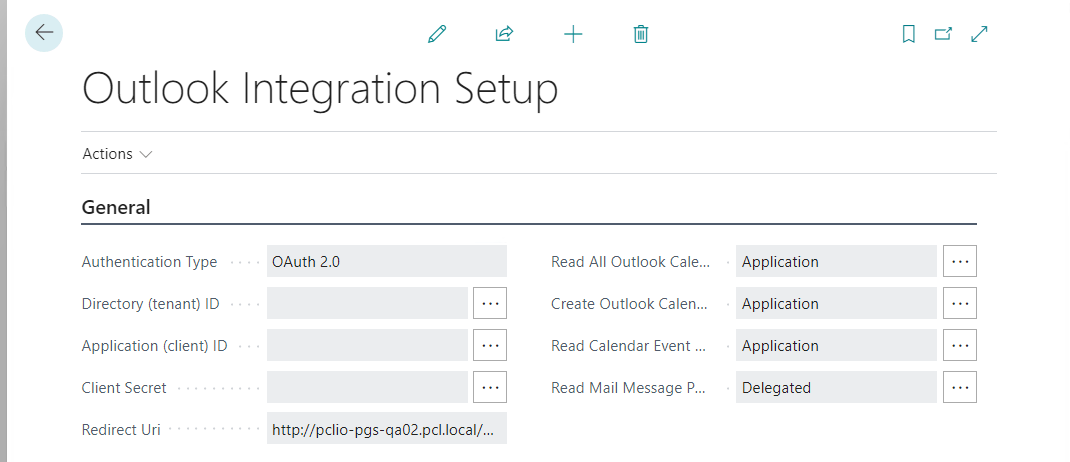
| Field | Description |
|---|---|
| Authentication Type |
Specifies the method the system uses to verify user's access. Options are Basic or OAuth 2.0 (recommended) |
| Directory (Tenant) ID | Specifies the Tenant ID from the tenant's Azure Active Directory properties. |
| Application (Client) ID | Specifies the Client ID from the tenant’s Azure Active Directory properties. |
| Client Secret | Enter the Client Secret for the tenant. |
| Redirect Uri | Specifies the value of the Redirect Uri field used for callback during app authentication flow. |
| Read All Outlook Calendar Events Permission | Specifies the app permission type to be directly as application or delegated as the signed in user, when reading Exchange Calendar events. |
| Create Outlook Calendar Event Permission | Specifies the app permission type to be directly as application or delegated as the signed in user, when creating Business Central Work Assignments as Exchange Calendar events |
| Read Calendar Event Permission (Outlook Add-in) | Specifies the app permission type to be directly as application or delegated as the signed in user, when reading single Calendar events via the Outlook add-in |
| Read Mail Message Permission (Outlook Add-in) | Specifies the app permission type to be directly as application or delegated as the signed in user, when reading single mail messages via the Outlook add-in |
API permissions must be added for each Application permission in the Outlook Integration Setup page in Business Central.
Important
For information on configuring the API Permissions required to Complete the Outlook Integration Setup API permissions fields, see the following article: Quickstart: Configure a client application to access a web API. See section Application permission to Microsoft Graph
Delegated Permissions: No explicit permission is required since each user will grant permissions to the Registered app on their own.
The required permissions for each field in Outlook Integration Setup are:
| Permission | Description |
|---|---|
| Read All Outlook Calendar Events permission |
Calendars.Read |
| Create Outlook Calendar Event Permission | Calendars.ReadWrite |
| Read Calendar Event Permission (Outlook Add-in) | Calendars.Read |
| Read Mail Messages Permission (Outlook Add-in) | Mail.Read |
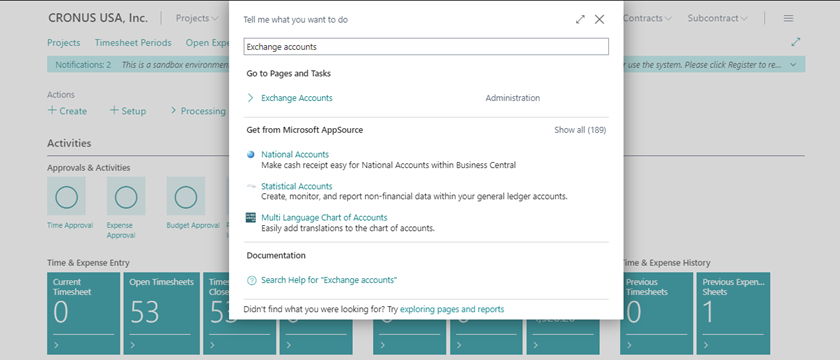
Configure Exchange Accounts
Use Search feature to navigate to Exchange Accounts and selected the related link.
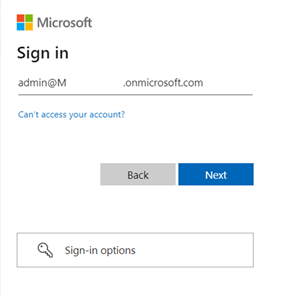
Enter the Admin user credentials.
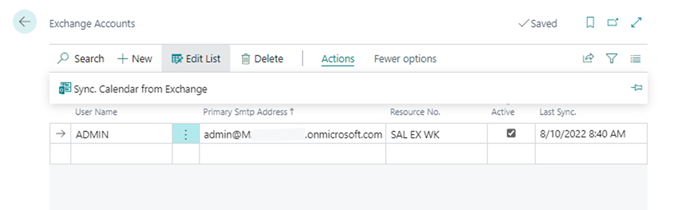
| Field | Description |
|---|---|
| User Name |
Specifies the identifier of the Resource assigned to the Exchange Account. For Outlook Progressus Integration, this user must have Admin rights. |
| Primary Smtp Address | Specifies the users primary SMTP address. This is the address user uses to log in to Business Central. |
| Resource No. | Specifies the Business Central Resource Number associated with the user entered in User Name. |
| Exch. Integration Active | Specifies if data can be exchanged with the user’s mailbox and calendar. For Outlook Progressus Integration, select this option. |
| Last Sync. | Specifies the last time data was synchronized from the Exchange calendar. This is a System generated date that is populated when you select Actions > Sync. Calendar from Exchange from the ribbon. |
From the ribbon, select More options and then select Sync. Calendar From Exchange.
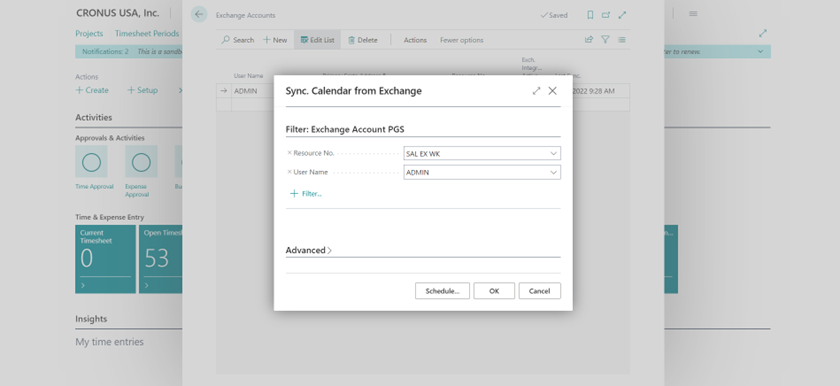
| Field | Description |
|---|---|
| Resource No. |
Enter the same Resource No. as selected in the Exchange Accounts > Resource No. page. |
| User Name | Enter the same User Name as selected in the Exchange Accounts > User Name. |
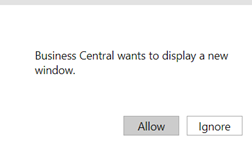
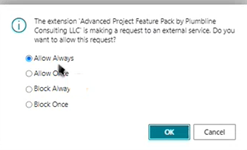
Click OK to message “The extension “Advanced Project Feature Pack by Plumbline Consulting, LLC is making a request to an external service. Do you want to allow this request?” Options are: Allow Always, Allow Once, Block Always, or Block Once.
Note
After the Sync. Calendar From Exchange process is completed, the Last Sync field is updated with the current date and time.
Outlook add-in Management
Use search feature to navigate to Outlook add-in Management and select the associated link.
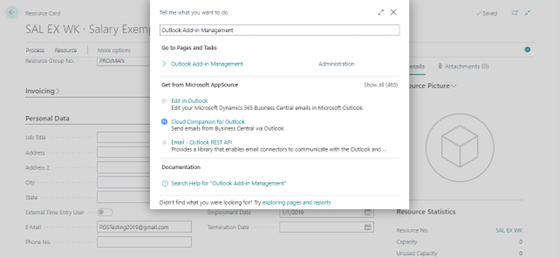
Highlight the line Outlook Integration for Progressus.
Click Download Add-in Manifest to download add-in manifest for Outlook integration. This will download an xml file to your Downloads folder on your local machine.

Get Outlook Add-in
Note
Installing custom add-ins from an XML file is currently only available through the Add-Ins for Outlook Dialog. The Microsoft Outlook Team is working to support this functionality in the new Store in Outlook (All Apps > Add Apps). For more information, see: Use add-ins in Outlook Until this functionality is supported by Microsoft, use the following link:
https://outlook.office365.com/mail/inclientstore
Tip
This link takes you directly to the Add-in Window. You may need to wait a moment for the window to load.
Under Add-Ins select My Add-Ins, then, at the bottom of the page, click + Add a custom add-in.
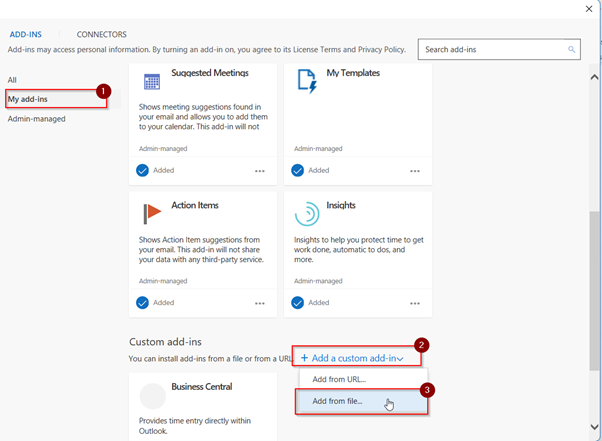
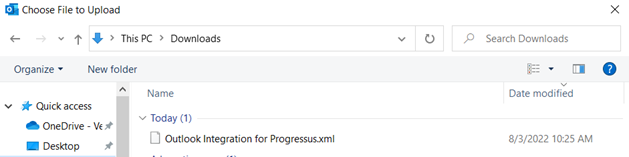
Navigate to the downloaded Outlook Integration for Progressus.xml file and select it.
 Click Install.
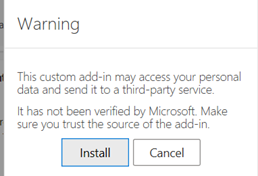
Exit the Outlook Add-in page after the installation completes successfully.
Login to Business Central Outlook Integration App in Outlook OWA
Open Outlook web (OWA).
Open an existing email and click on the three dots on the right.
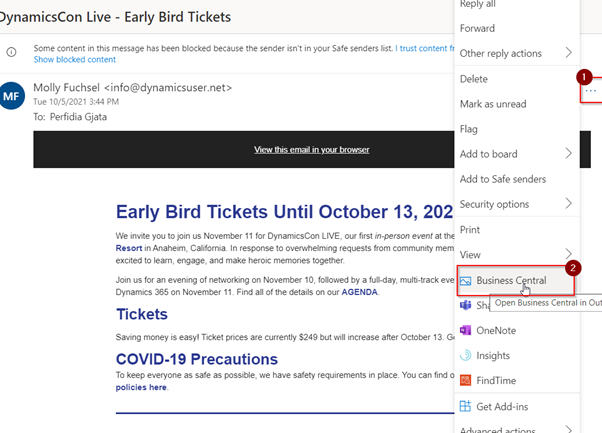
The Business Central add-in displays in the list.
Click the Business Central add-in icon to open.
Sign in with Business Central login credentials, when prompted.